Integration Keys in Afina#
In this guide, you will learn how to add, edit, search, and delete integration keys in Afina. This section is intended for securely storing service data used in scripts, modules, automations, and external APIs.
What integration keys are#
Integration keys are a specialized table in Afina for storing and managing confidential data, such as API keys, tokens, passwords, and other service values.
This section works as a separate storage area for technical secrets, so confidential data is kept separate from the logic of scripts, modules, and automations.
The main feature of this tool is security. In the Value column, data is displayed in a masked form, which helps hide sensitive information from accidental viewing by other people.
Opening the section#
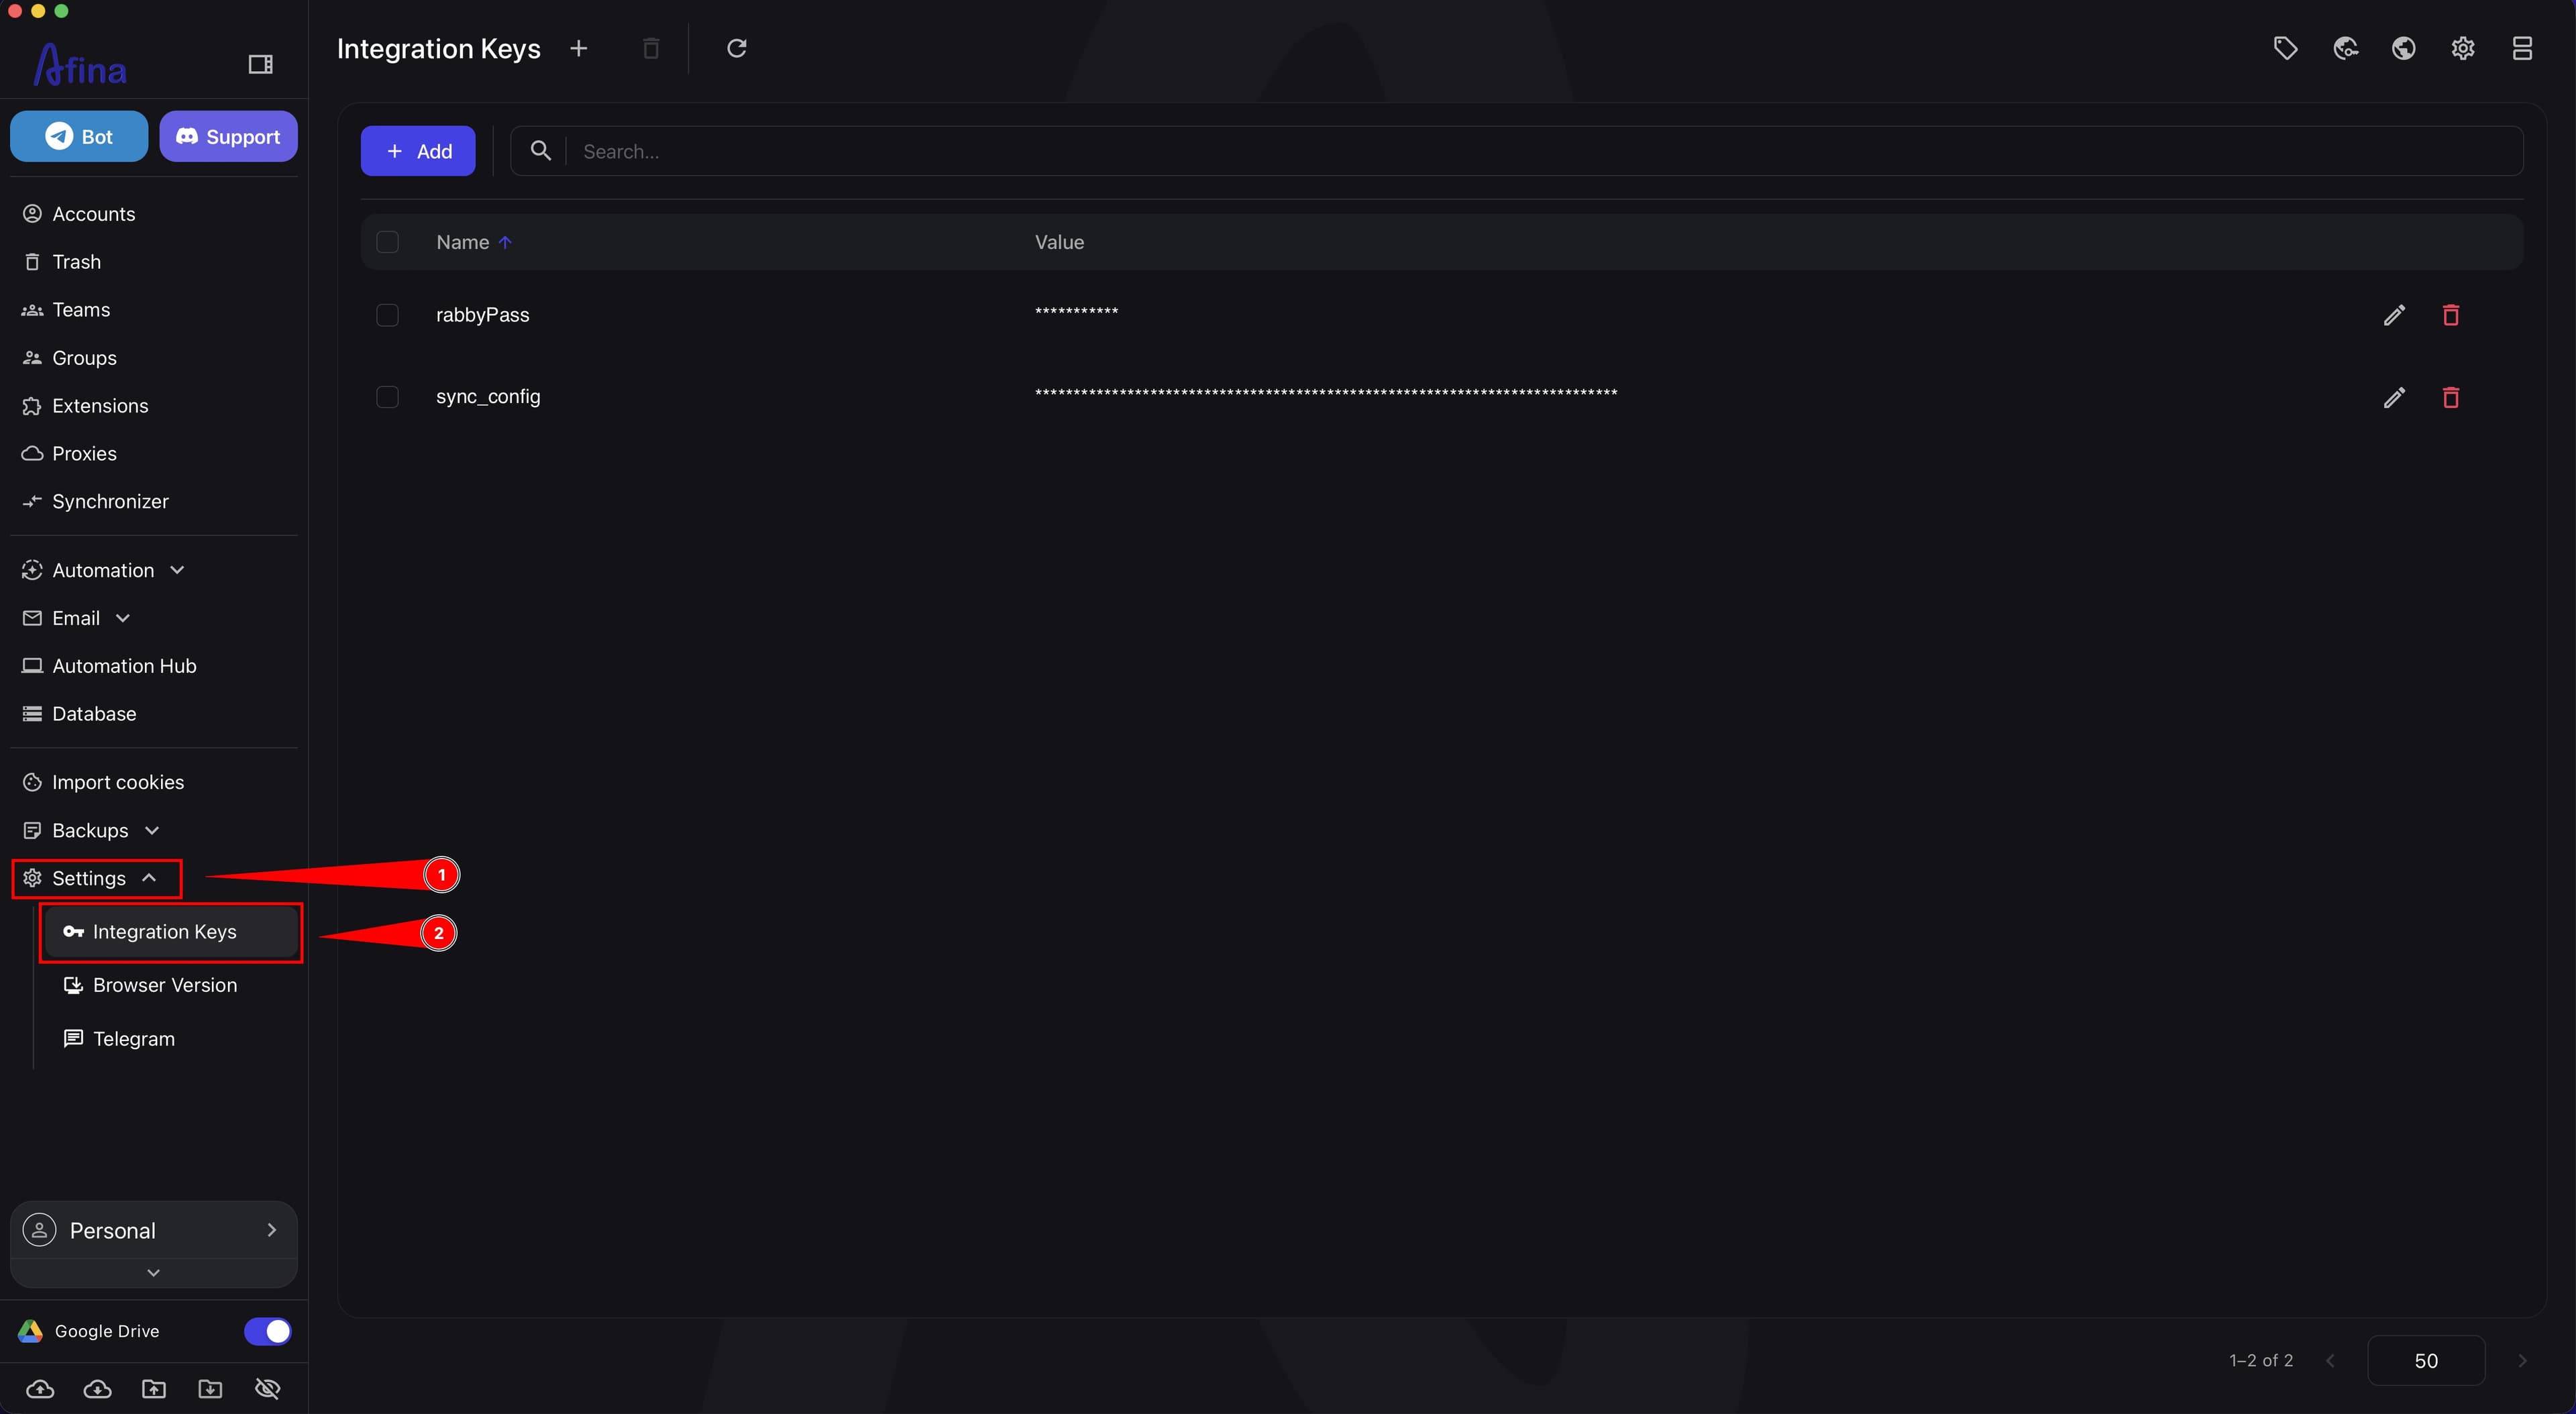
- Go to Settings.
- Open Integration Keys.
The screenshot below shows where Integration Keys is located in the left navigation panel.
Adding a new key#
- Click + Add at the top of the page.
- In the Create key/value window, fill in the key data.
- In the Name field, enter the name you will use to identify this key.
- In the Value field, enter a token, password, or another service value.
- Click Save.
- Find the needed record in the table if you want to check that the key has been saved.
The next screenshot shows the Integration Keys page with the + Add button and the open Create key/value modal window with the Name and Value fields that must be filled in before saving.
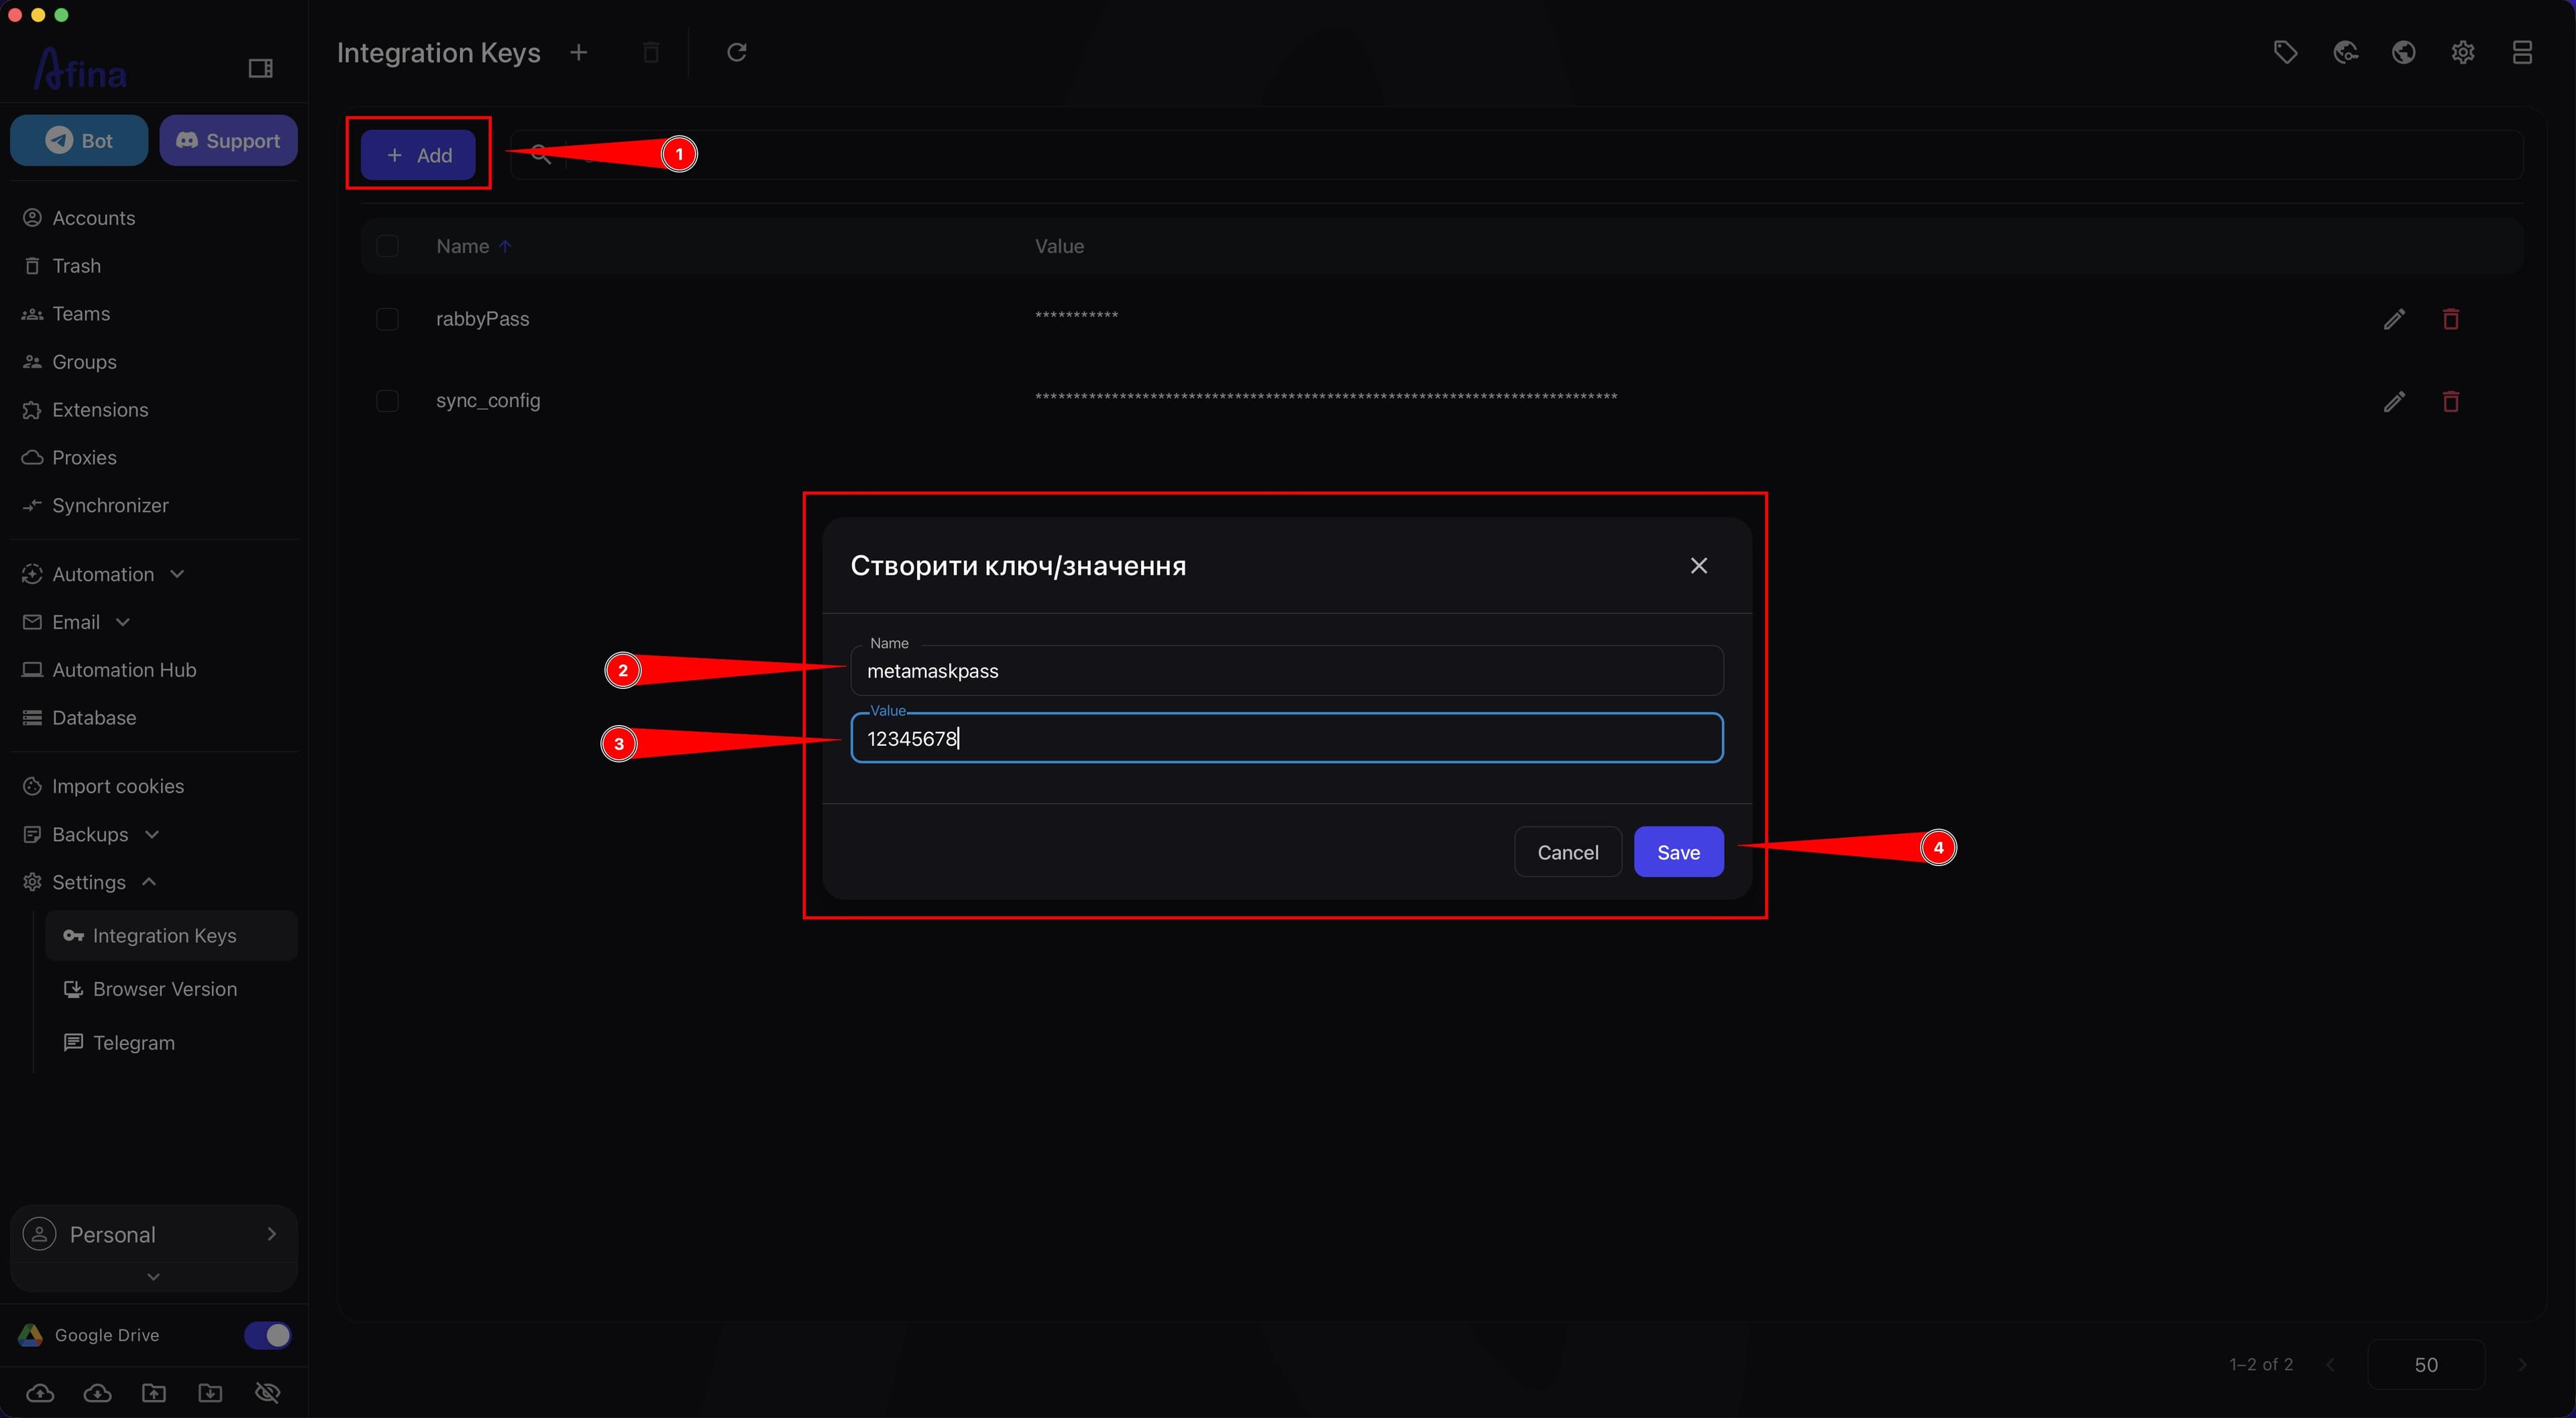
The Name and Value fields are required. The name must contain from 3 to 25 characters. The name and value must be unique. If you add a record with a duplicate name, the system will show the error “A key with this name already exists”. If the value is duplicated, the system will show the error “A value with this key already exists”.
After saving, the key value is displayed in the table in a masked form. You can view or change it only through the Edit key/value window.
Editing a key#
- Find the needed record in the table.
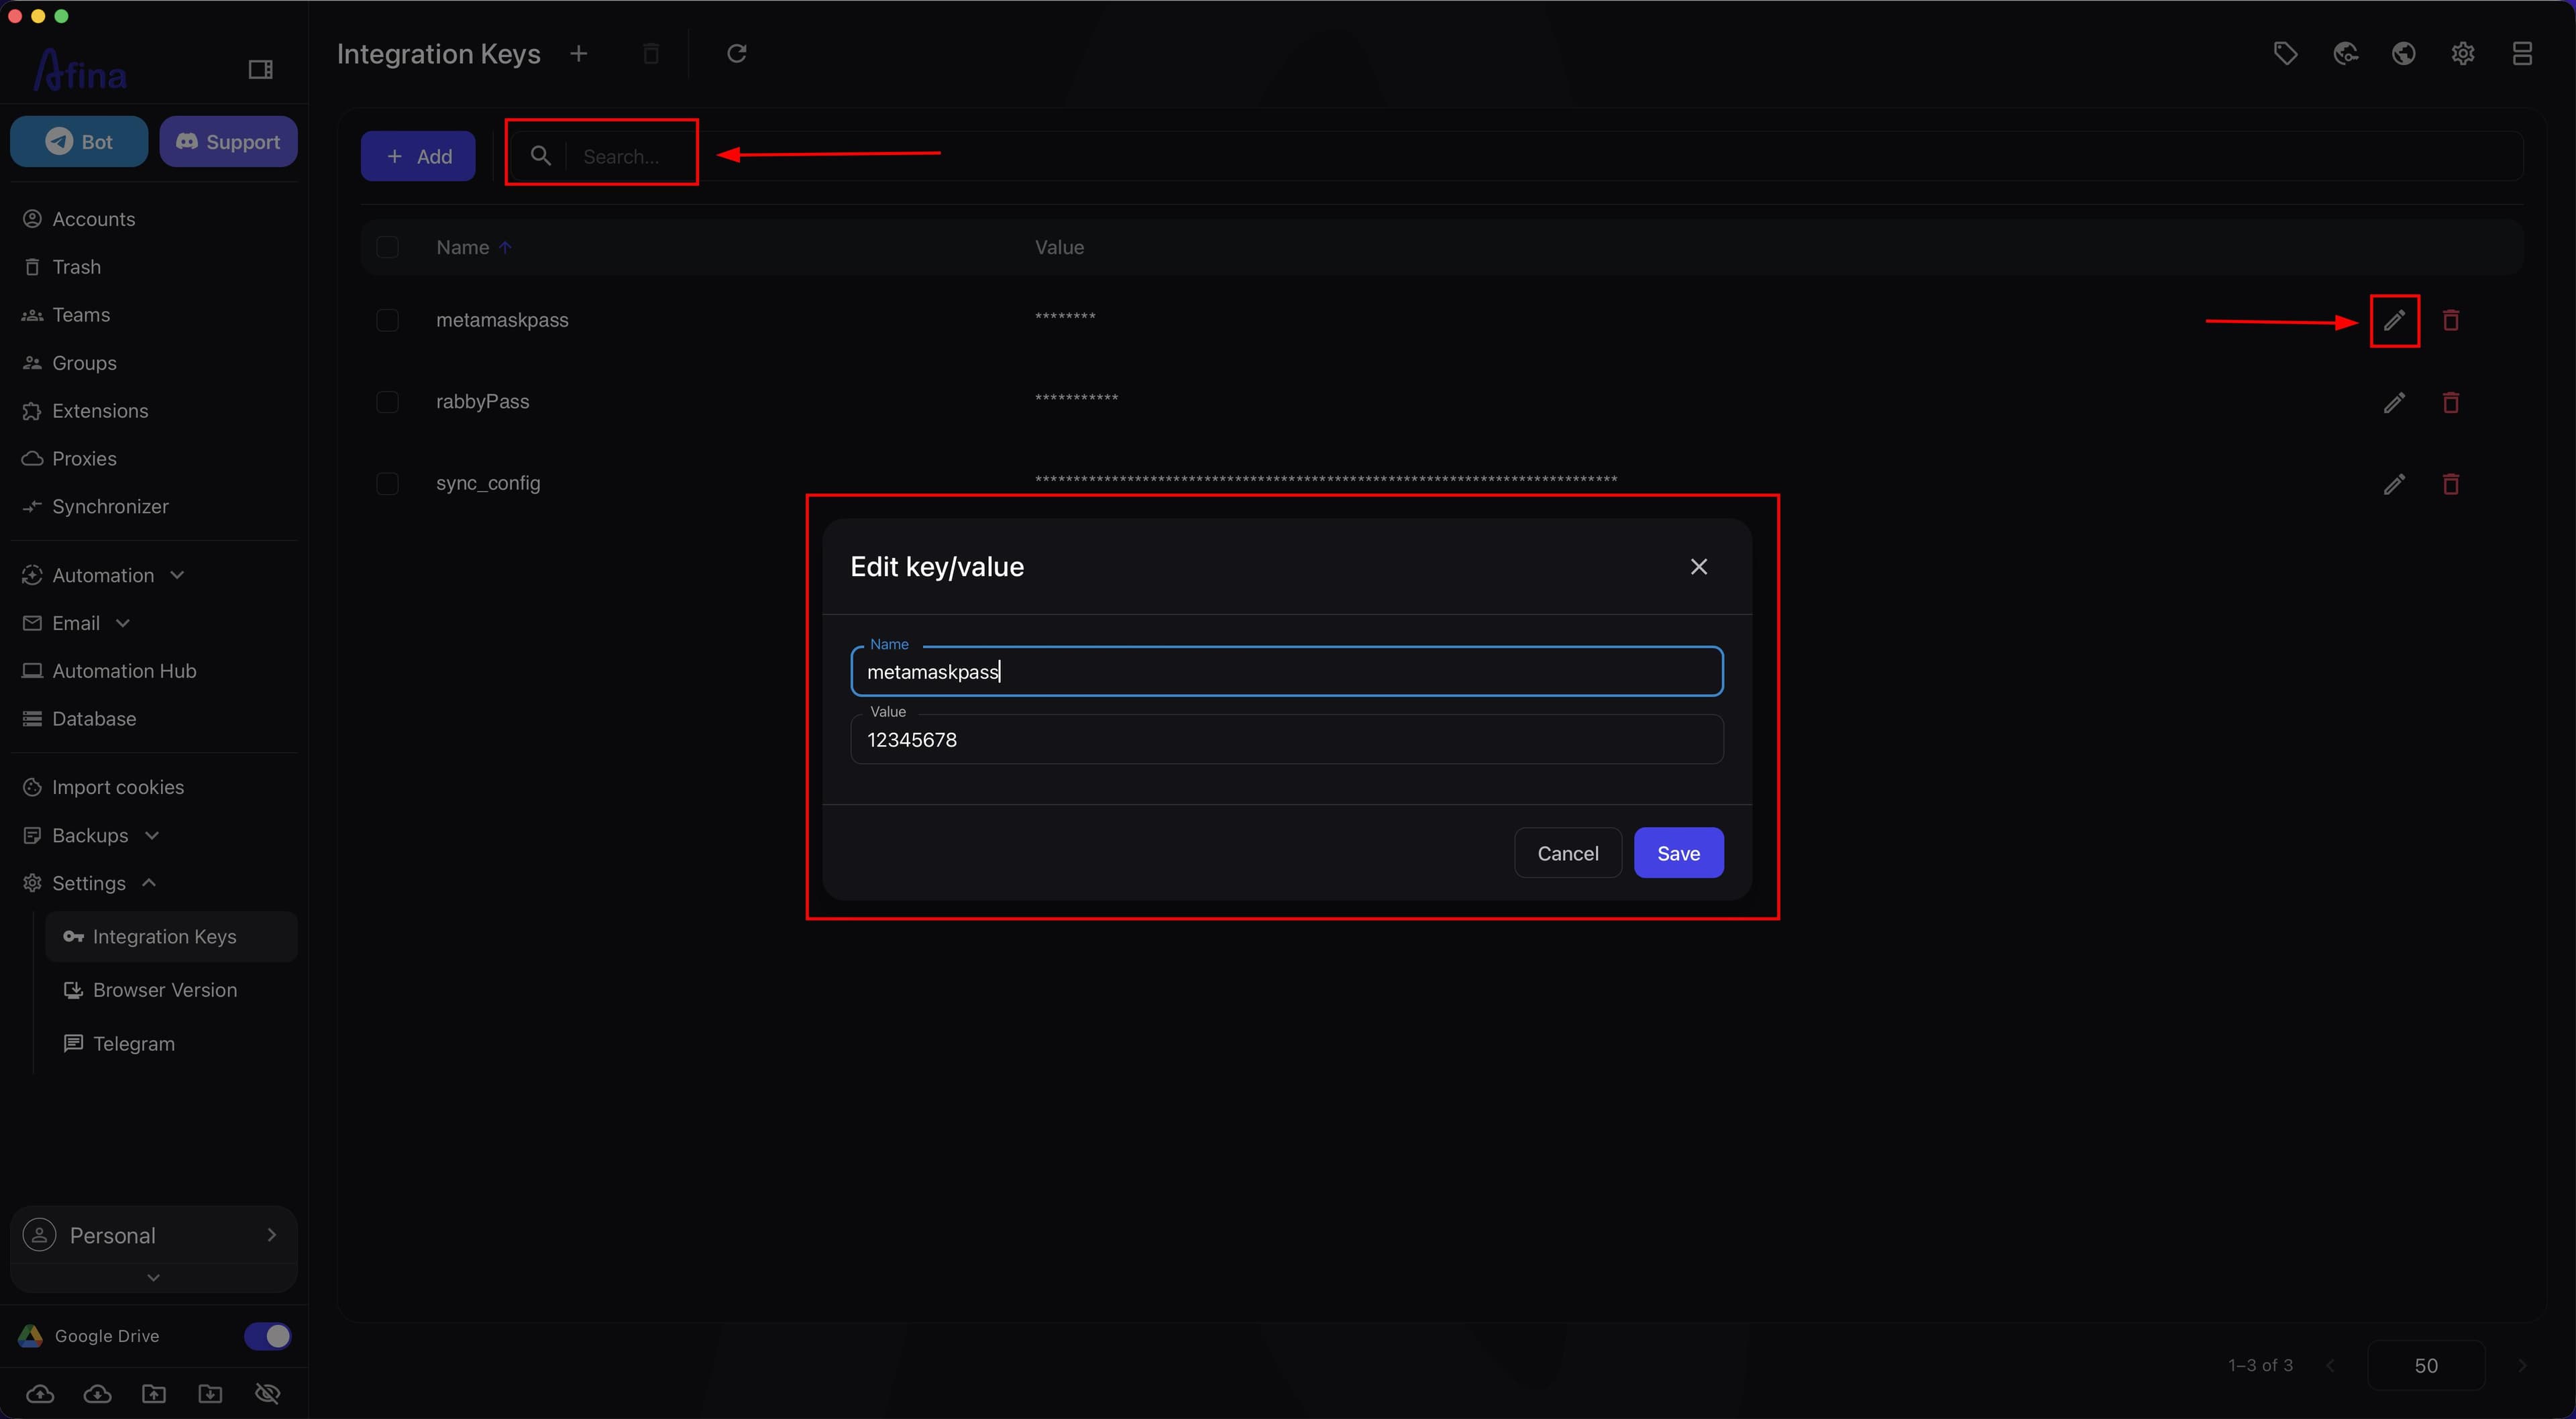
- In the Search... field, enter the key name if you need to quickly find a specific row.
- Click the Edit icon on the right side of the needed row.
- In the Edit key/value window, make the needed changes.
- Click Save.
- After a successful update, the system will show the message “Key/value updated successfully”.
This screenshot shows the keys table with the Search... field, the Edit icon on the right side of the row, and the open Edit key/value window after clicking it.
Deleting keys#
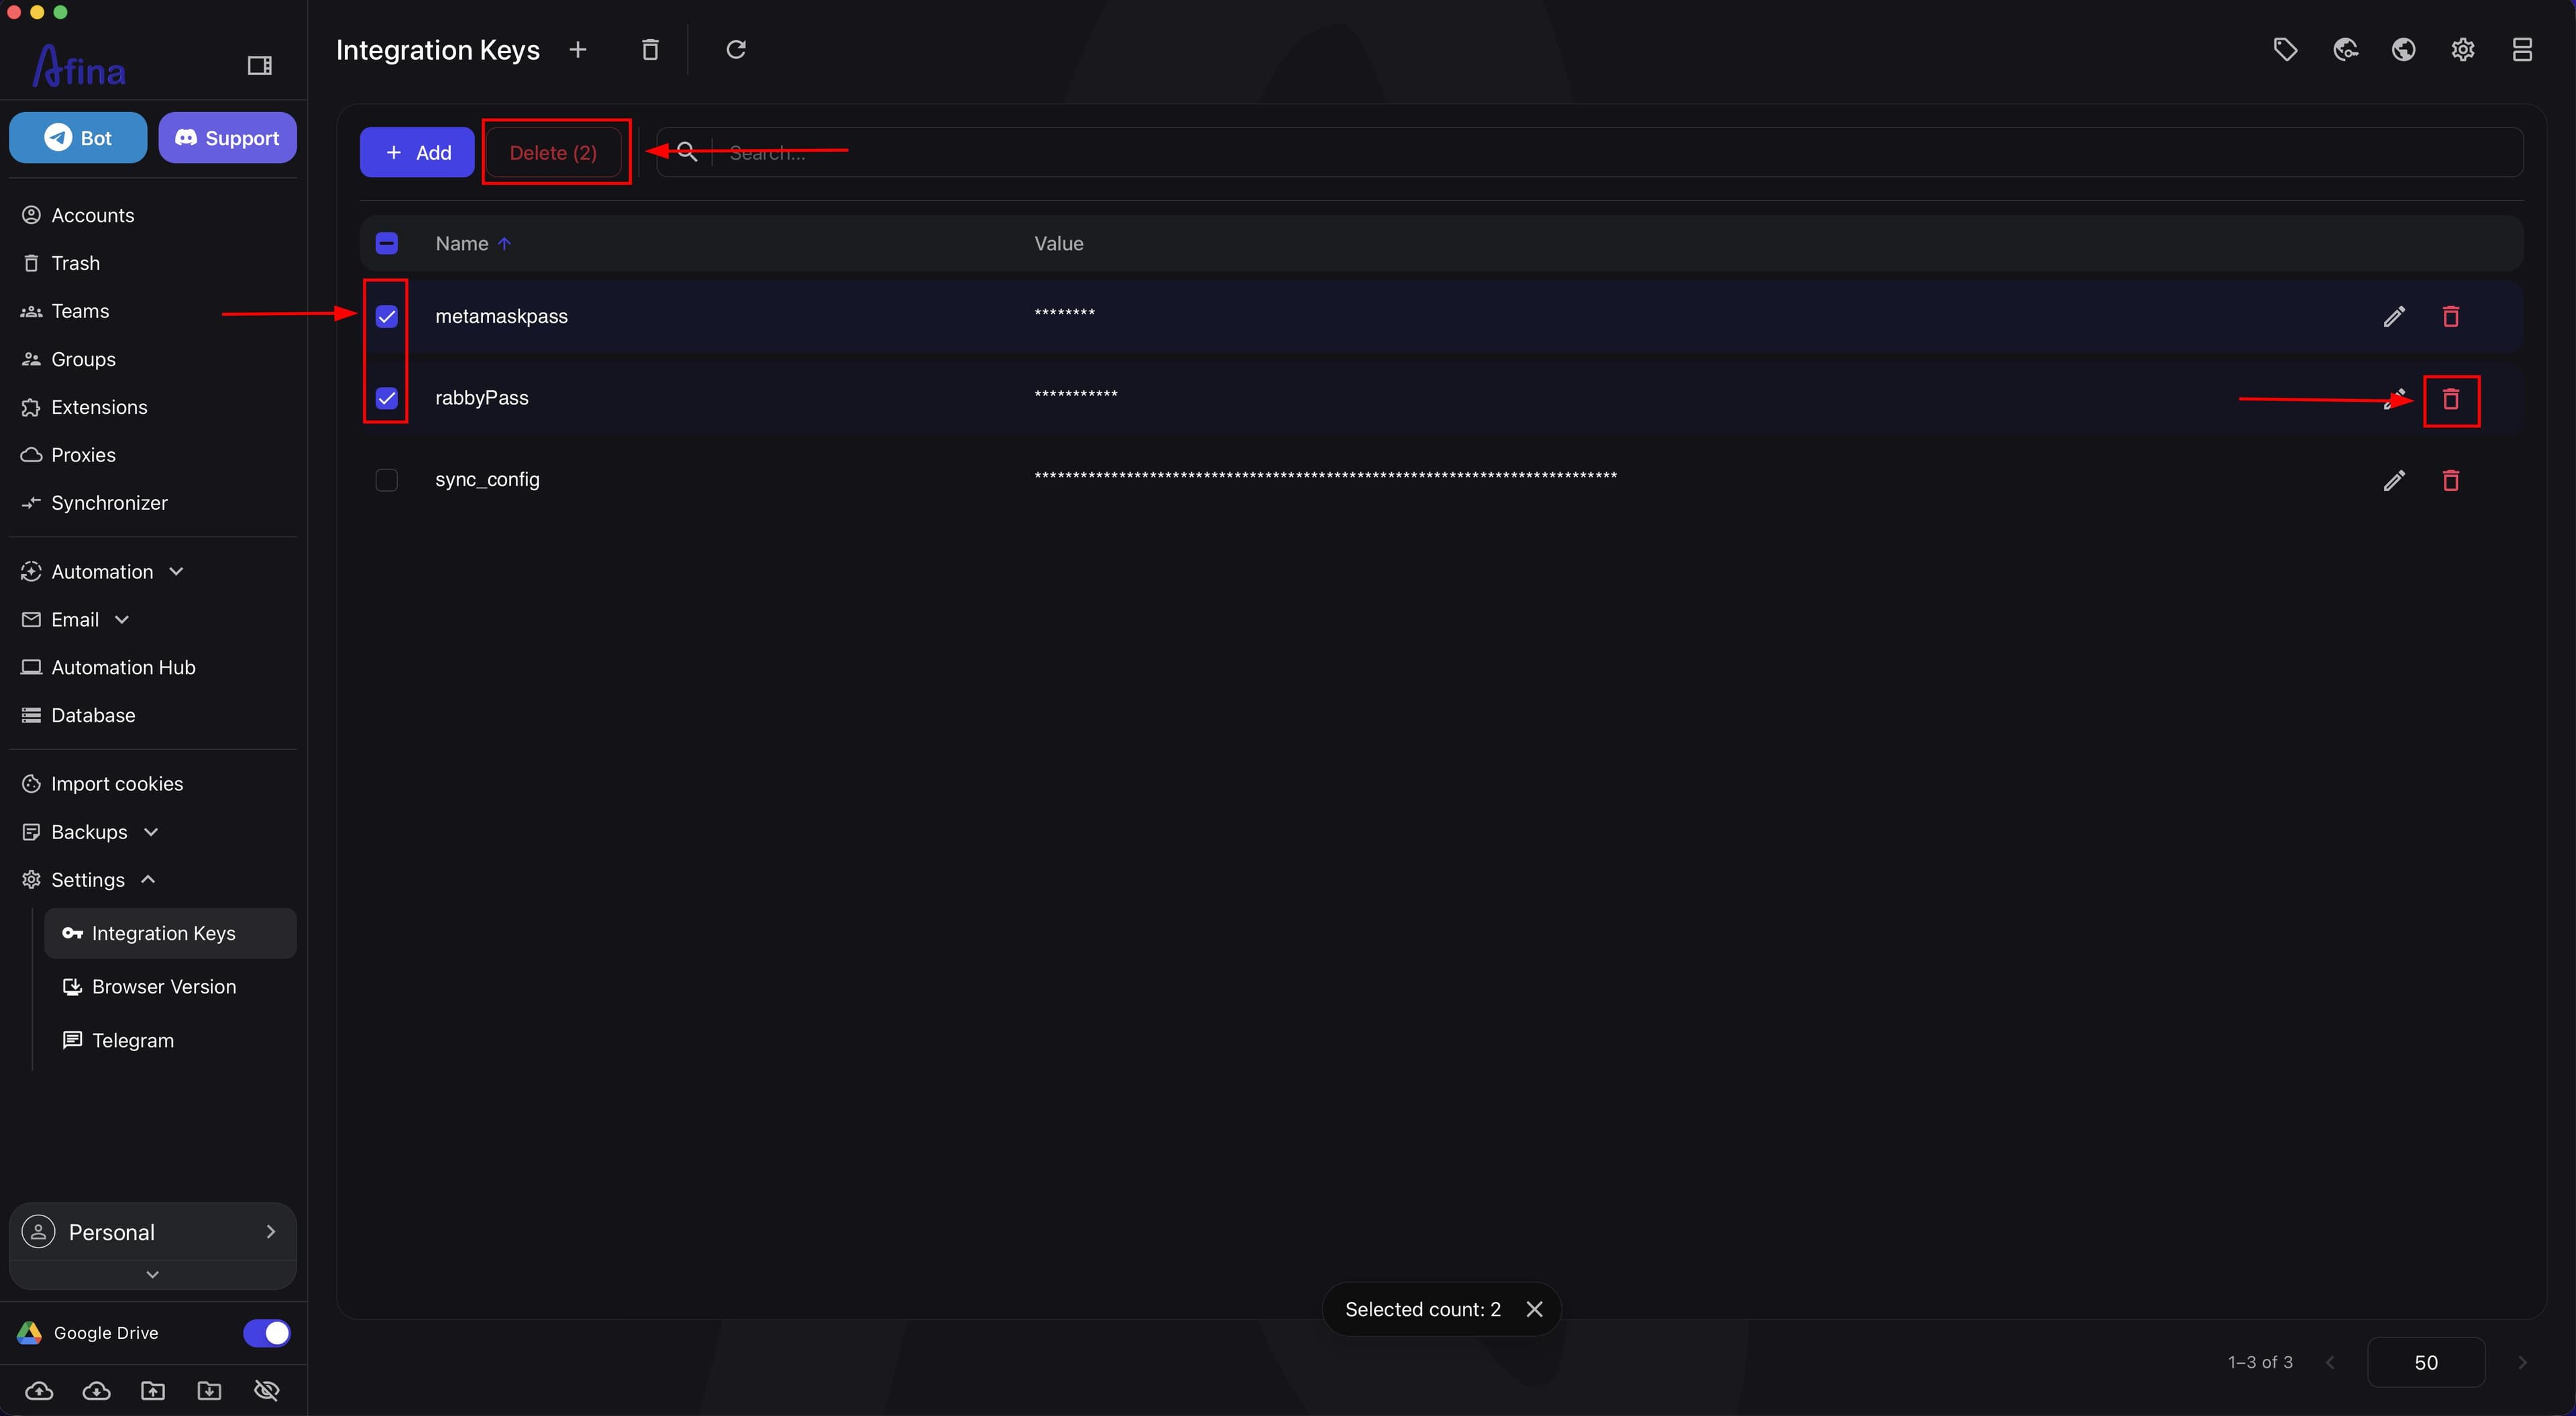
- Click the Delete icon in the key row if you need to delete one record.
- Select the needed keys with checkboxes on the left side of the table if you need to prepare them for bulk deletion.
- Click the Delete icon on the top control panel.
- Click Confirm in the confirmation window.
To avoid deleting the key, click Cancel or close the confirmation window.
After confirming deletion, the record will be permanently deleted from the database.
The screenshot below shows single deletion through the Delete icon in the needed key row and bulk deletion through selected checkboxes and the Delete icon on the top control panel.
Search, sorting, and refresh#
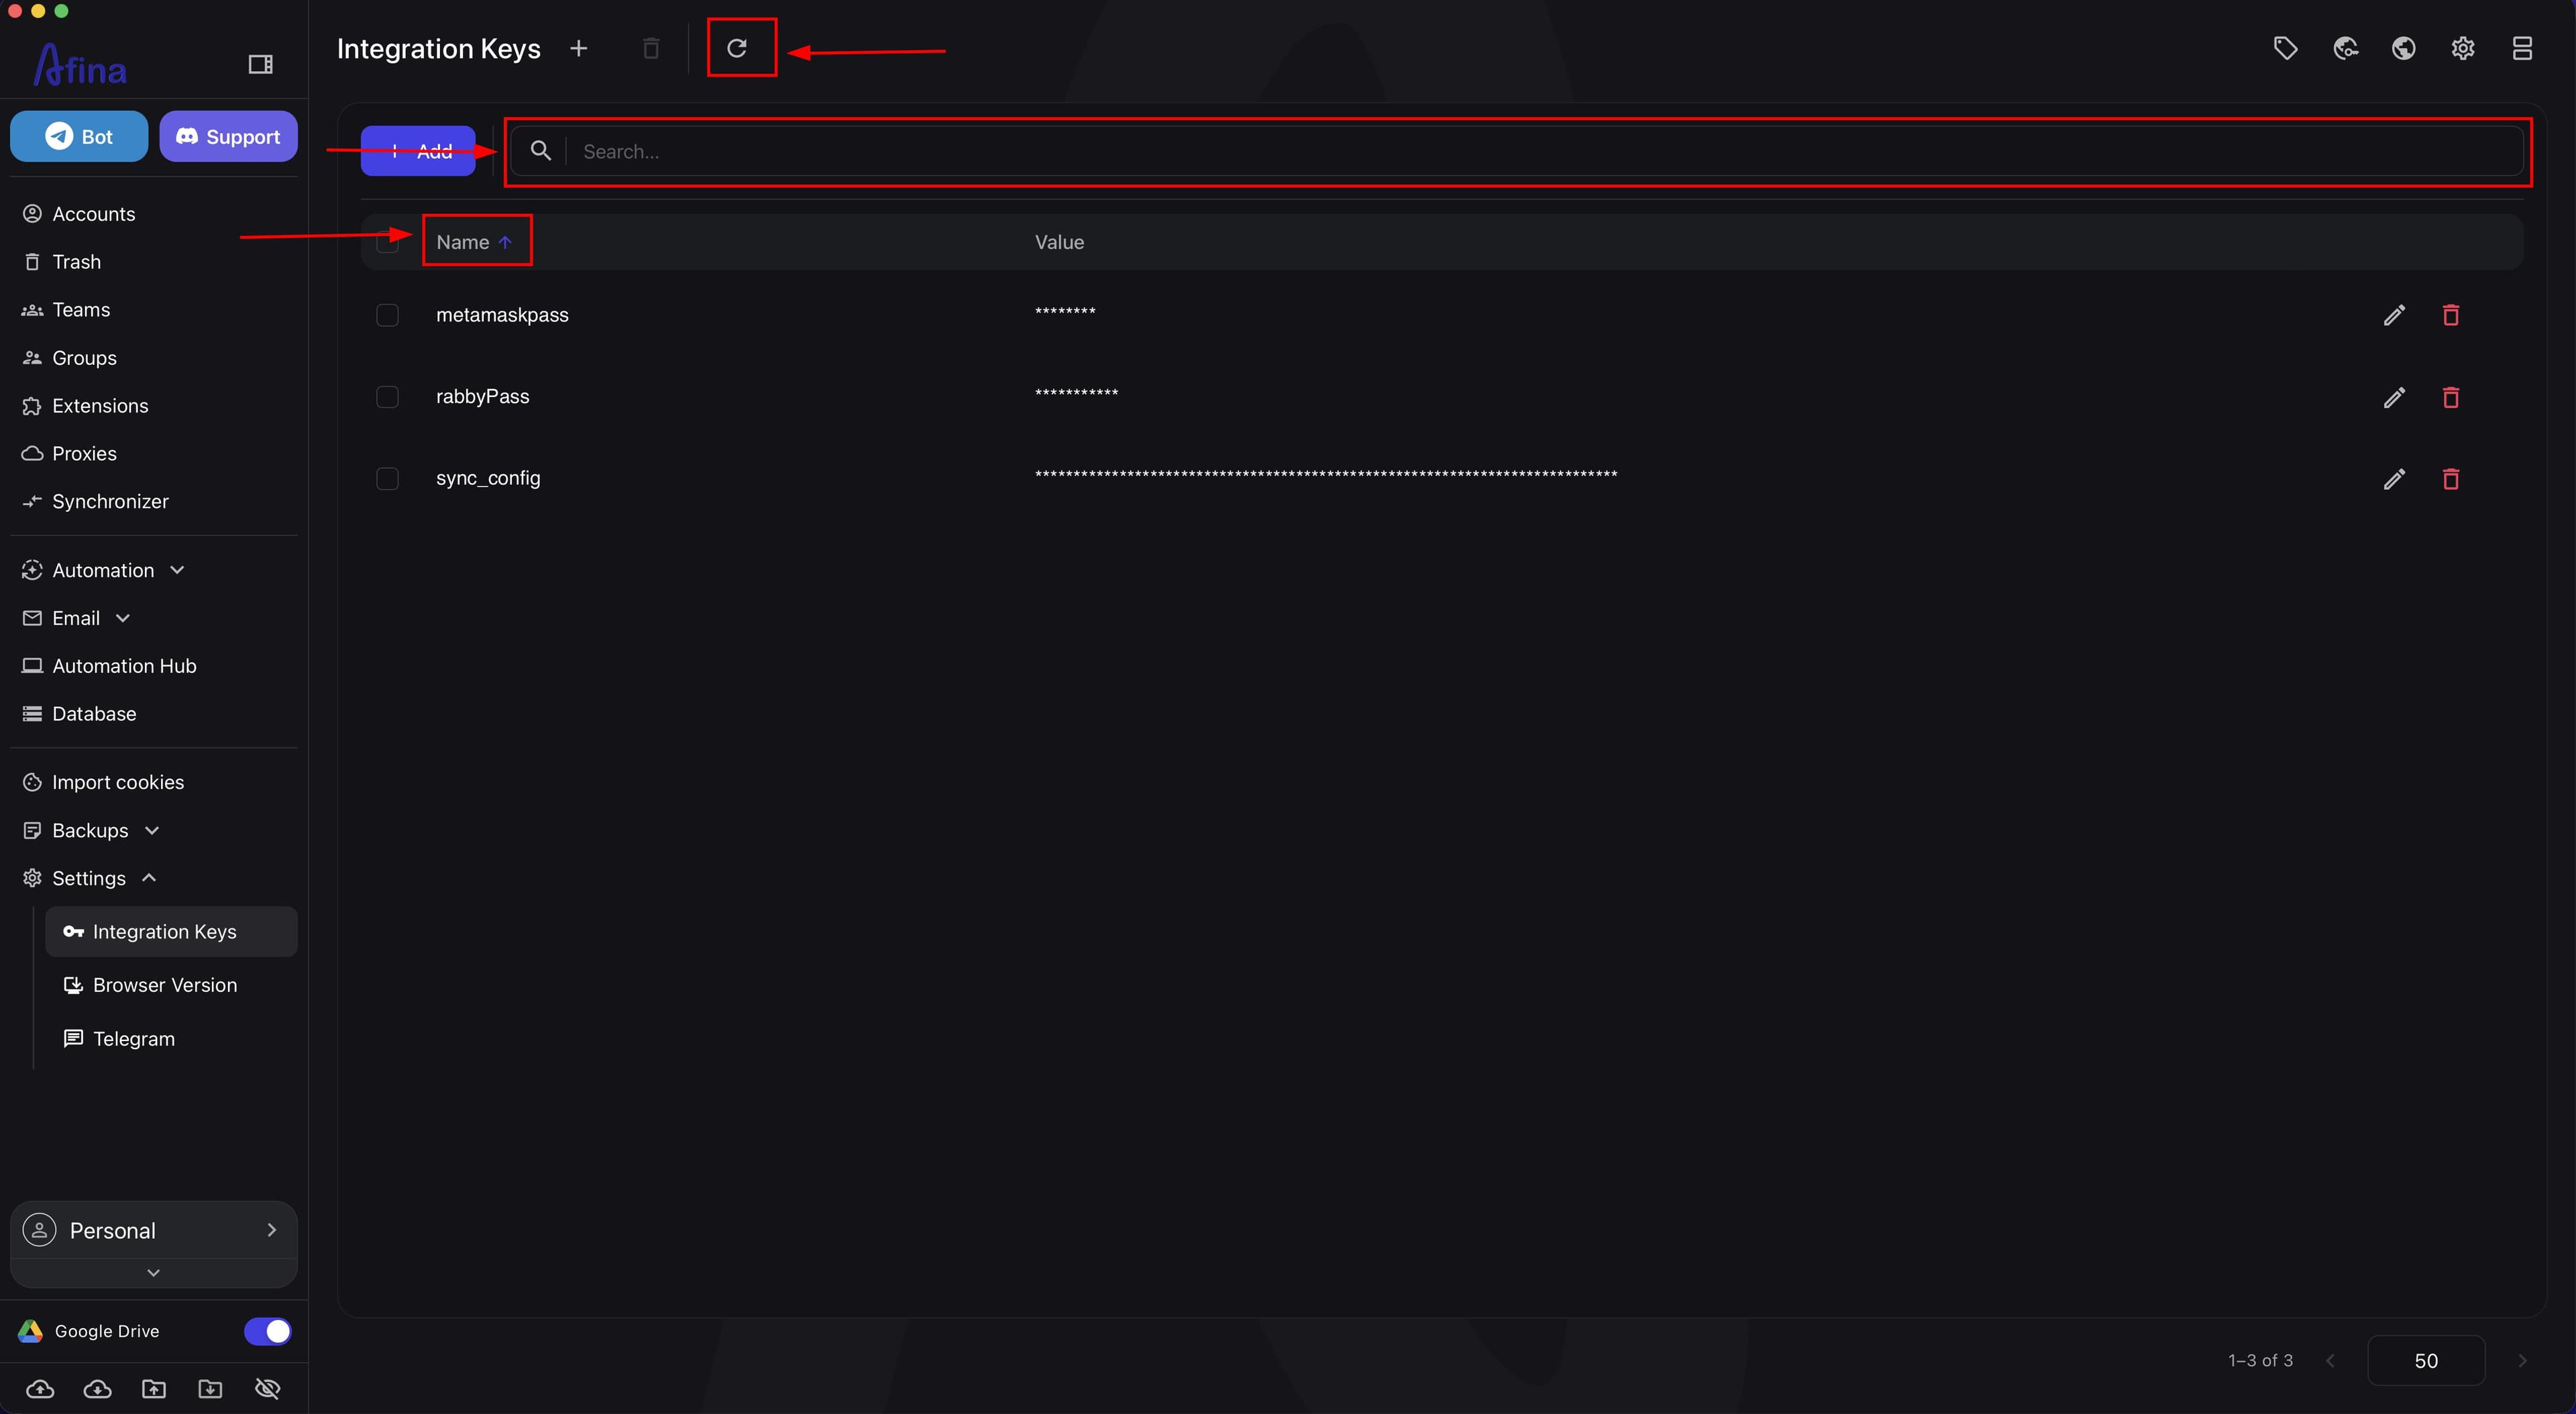
- In the Search... field, enter the key name if you need to filter the list. The table is filtered immediately as you type.
- To return the full list, clear the field with the clear icon or delete the text manually.
- Click the Name column header if you need to sort records by name.
- Click the Value column header if you need to sort records by value.
- Click the column header again to change the sorting direction.
- Click Refresh if you need to update the table state after changes.
The screenshot below shows the keys table with the Search... field, the Name and Value column headers, and the Refresh button.
Where keys are used#
In scripts, this is the main usage scenario. Instead of entering a token directly into a script block, you call it by name from the table. This lets you quickly update the token for all scenarios by changing only one value.
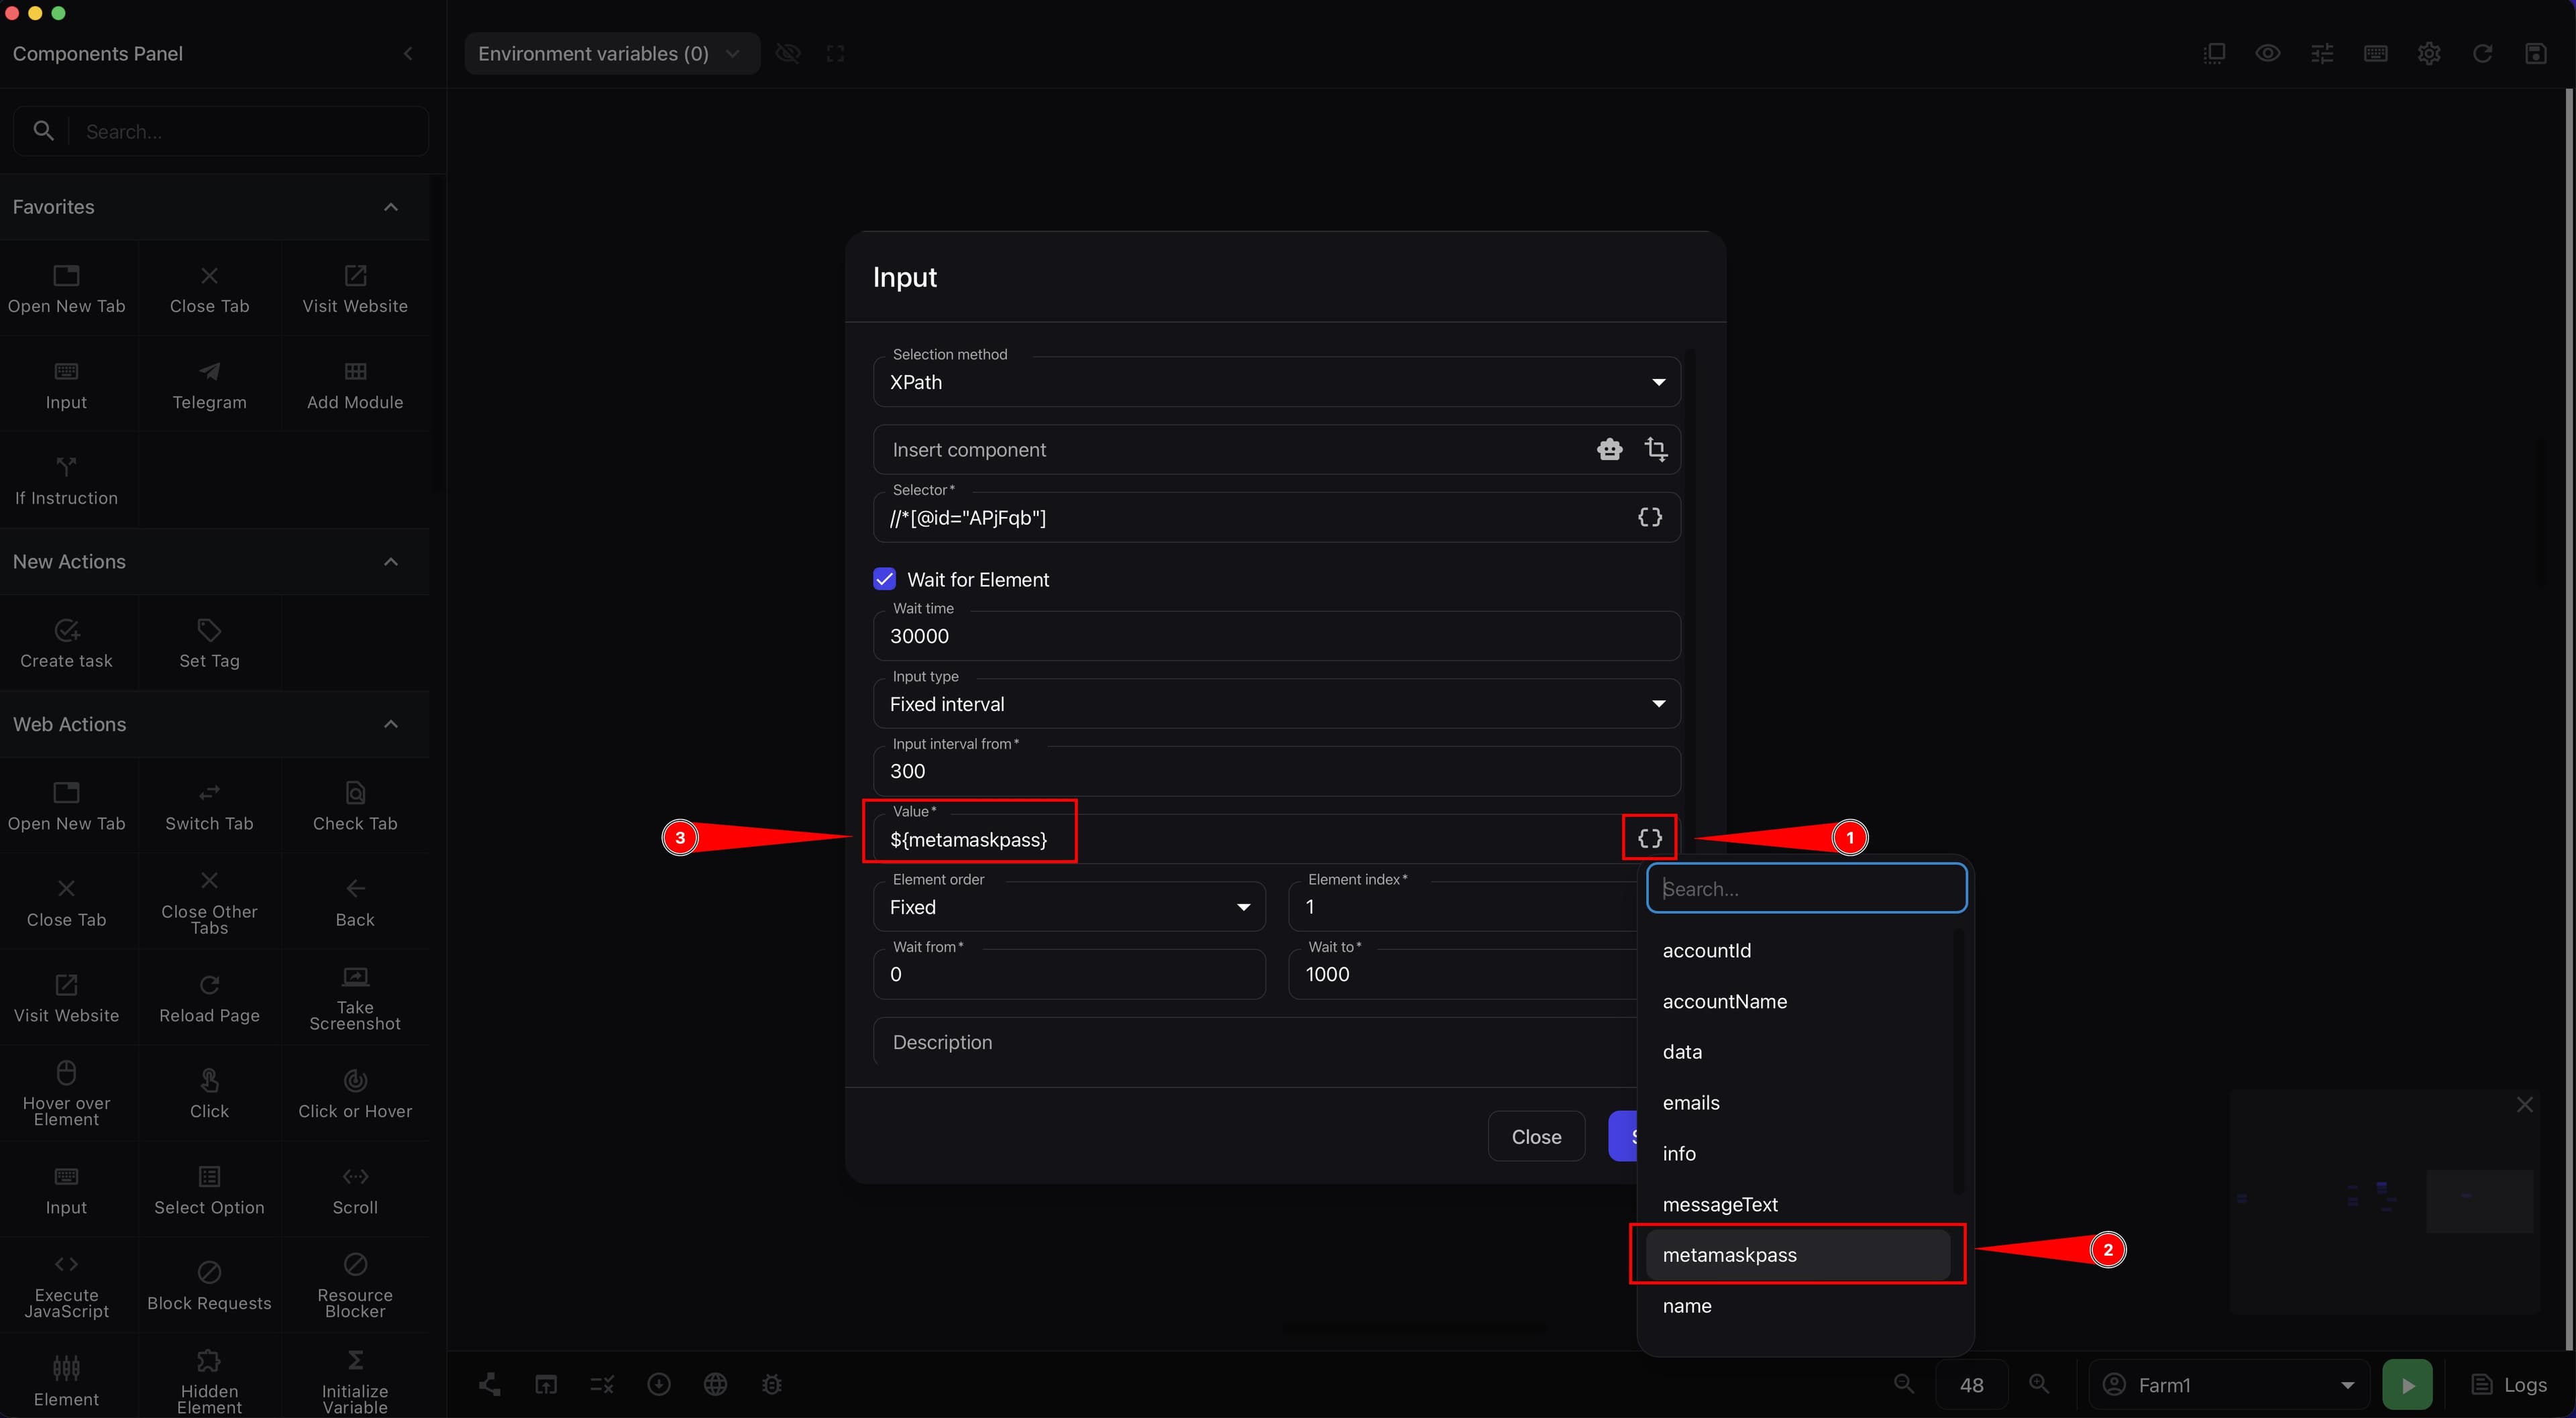
For example, in the Input component, click the variable selection icon to the right of the Value field.
In the list of variables, select the needed integration key. For example, if your table has a key named metamaskpass, select it.
After selection, a variable in the ${metamaskpass} format will appear in the Value field.
The screenshot below shows how integration keys are inserted into a script through the Value field.
In modules, they are used to securely pass technical parameters without storing tokens directly in code. If you share a module with another user or team, they only need to add their own key with the same name in their table.
In automations and triggers, they are used to interact with the external environment when a scenario needs to perform authorization, pass technical parameters, or work with external services.
Sensitive values are not exposed in plain text through the API or MCP. External scripts and AI tools can work with keys by their names, but they do not see the values themselves. Decryption happens locally in the executor immediately before the scenario starts.
Related integration settings#
In addition to the Integration Keys table, Afina's main settings include the API and External tabs. They are responsible for separate integration parameters.
On the API tab, you set the ChatGPT API Key and Telegram bot token. For ChatGPT, you can also specify a separate proxy in the proxy:port:login:password format.
On the External tab, you configure data for integrations with other antidetect browsers: local links with ports for AdsPower and Dolphin, the Dolphin API key, and Vision X-Token.
In technical API work, the key_entity registry stores only key names. Actual values are not stored in this registry and are received through a request to /api/accounts/vars. The /api/keys/* endpoint group is used to access the catalog of API keys and tokens.
API usage restrictions#
When working with integration keys through the local API, the system requires the x-api-key header. Without it, the request will not be executed, and the connection may be closed.
The local Afina HTTP server runs on port 50778. All requests require x-api-key, except GET /api/health and OAuth callback.
The CORS policy accepts requests only from http://localhost, http://127.0.0.1, and the internal tauri:// protocol. Calls from external websites are blocked by the CORS policy.
There is no direct access to the API from another PC: the MCP server and the local API work locally, and data should not leave the device.
Result#
After completing these steps, you will be able to manage integration keys in Afina from one table: add new values, search for needed records, edit them, sort the list, and safely delete keys you no longer need.