Synchronizer in Afina#
In this guide, you will learn how to use the Synchronizer in Afina to manage multiple browser profiles at the same time. After completing the steps, you will be able to start action synchronization, align windows, move them between monitors, and manage tabs in bulk across selected accounts.
Before you start#
- Go to the Accounts section.
- Click Start for the first profile that will take part in synchronization.
- Click Start for the second profile to prepare at least 2 accounts for work.
The screenshot below shows the Accounts section with running profiles that are already ready to work in the Synchronizer.
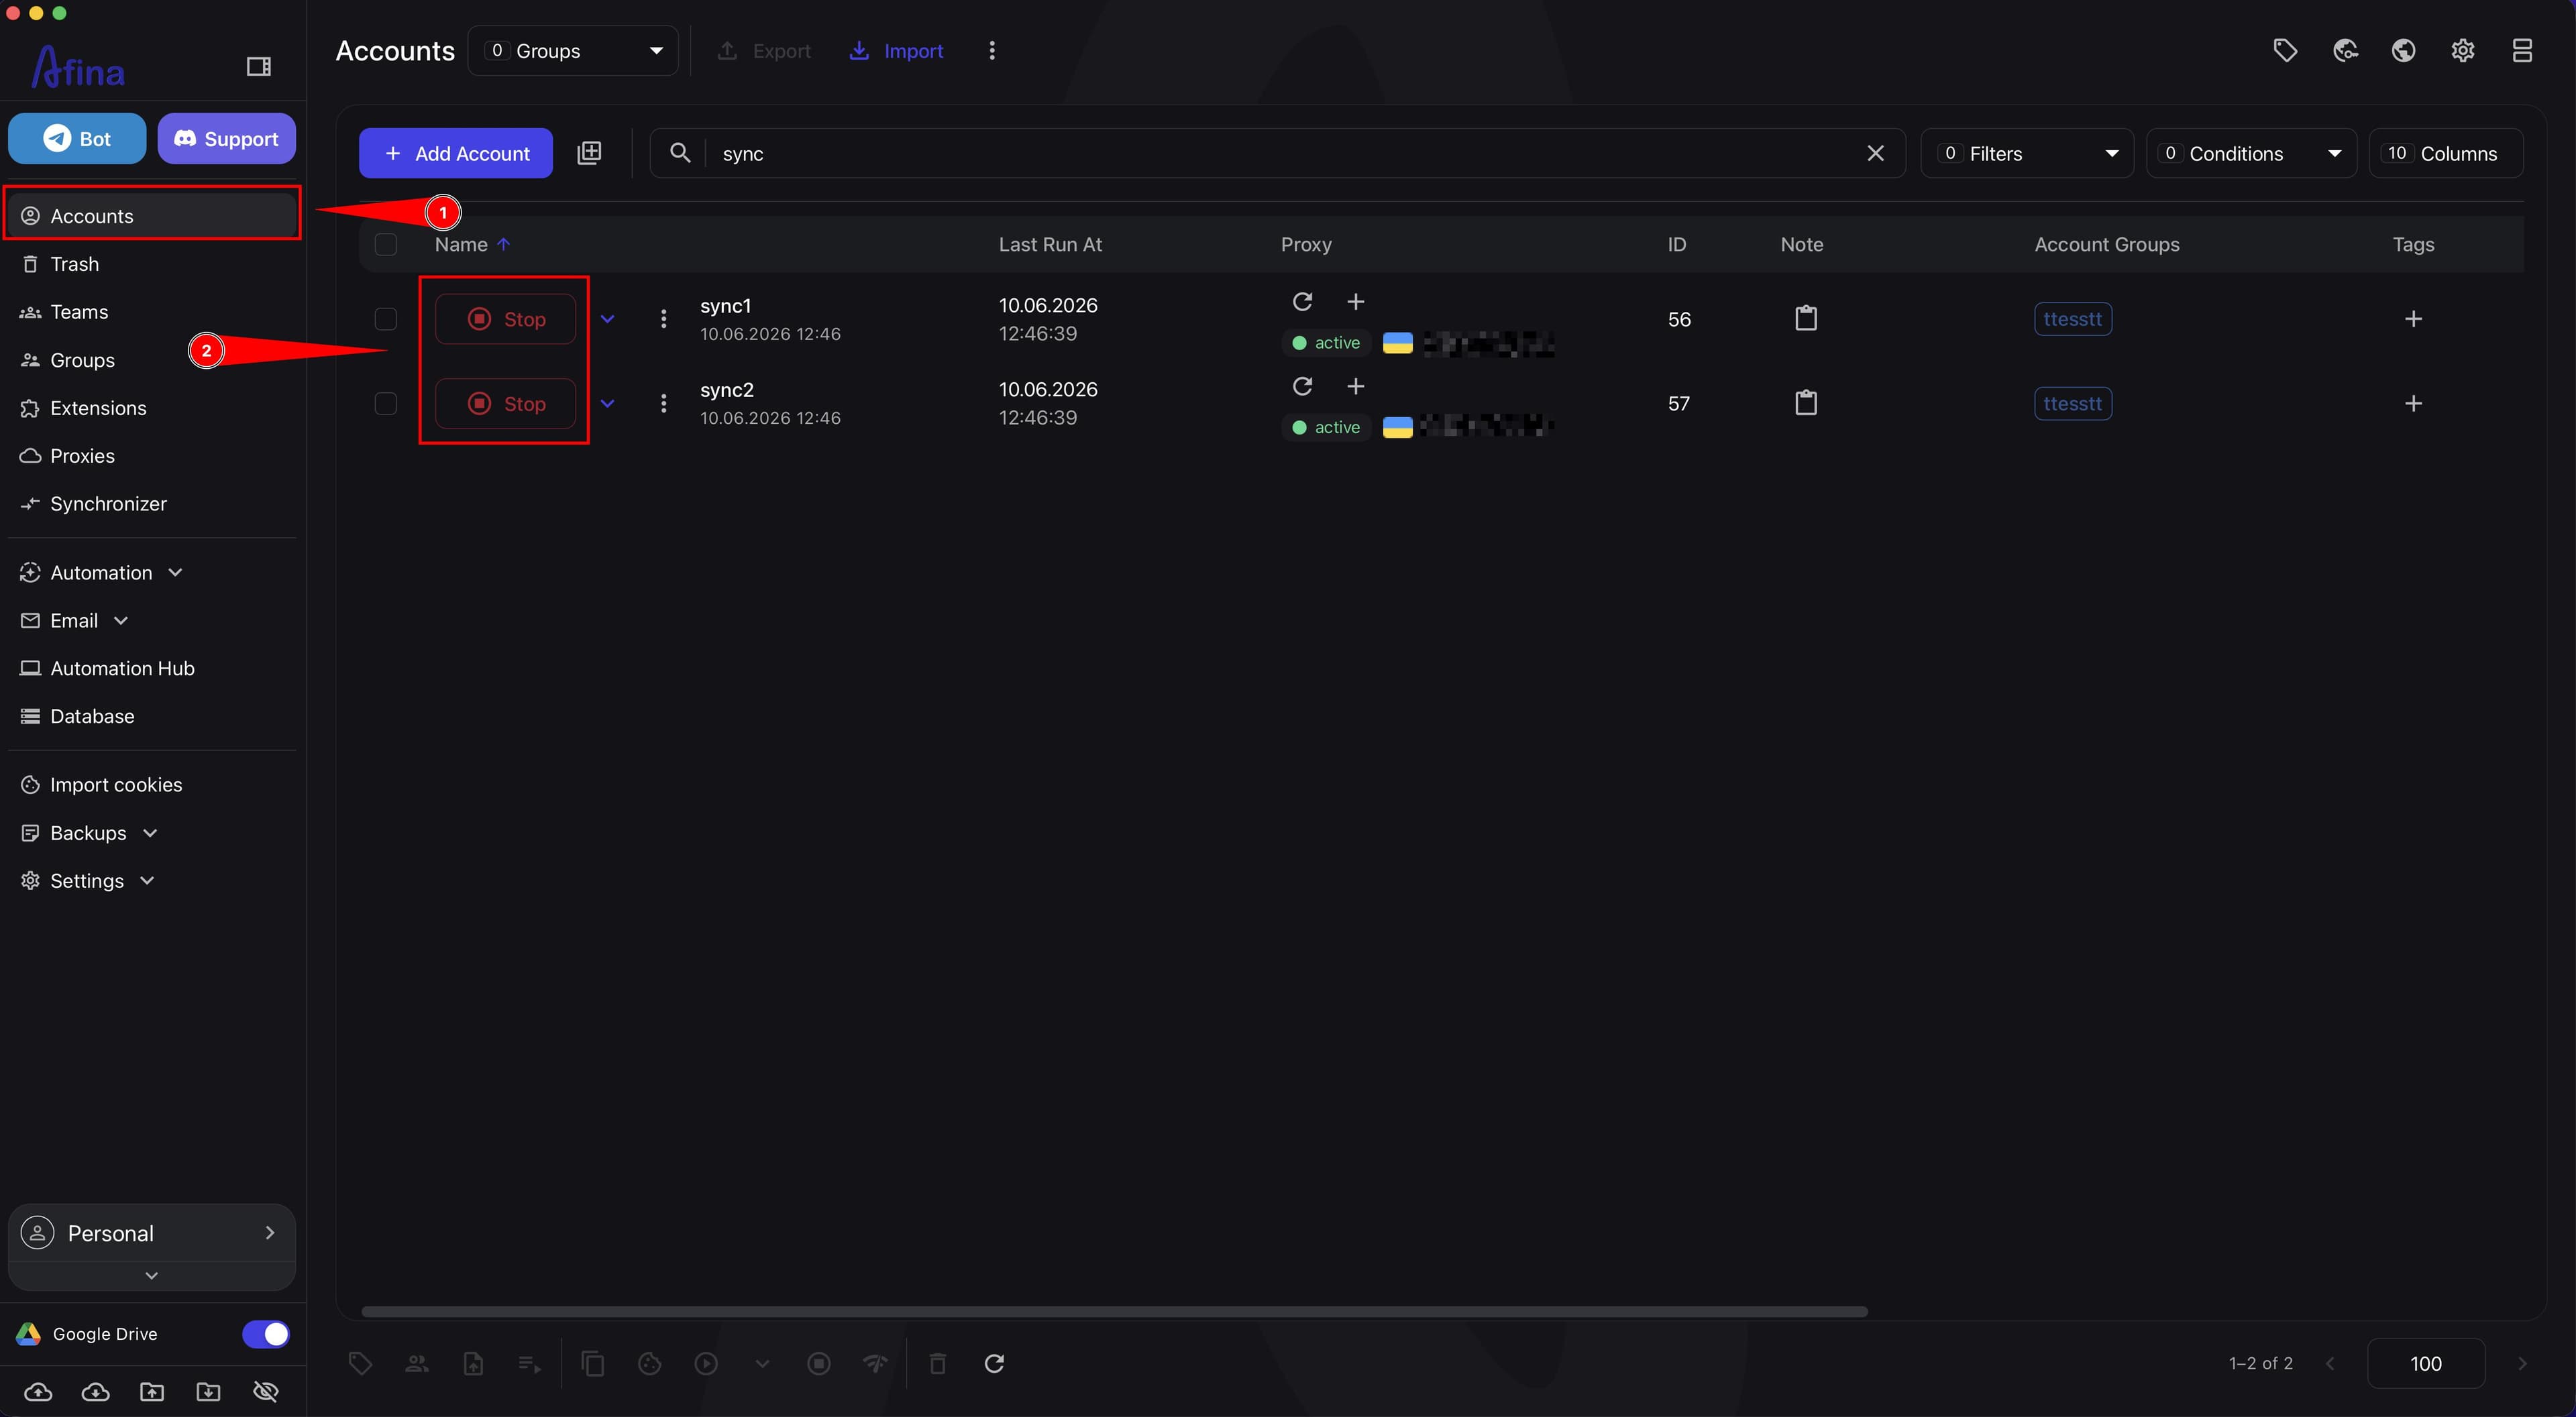
The Synchronizer works only with accounts that have already been started in the Accounts section.
Starting synchronization#
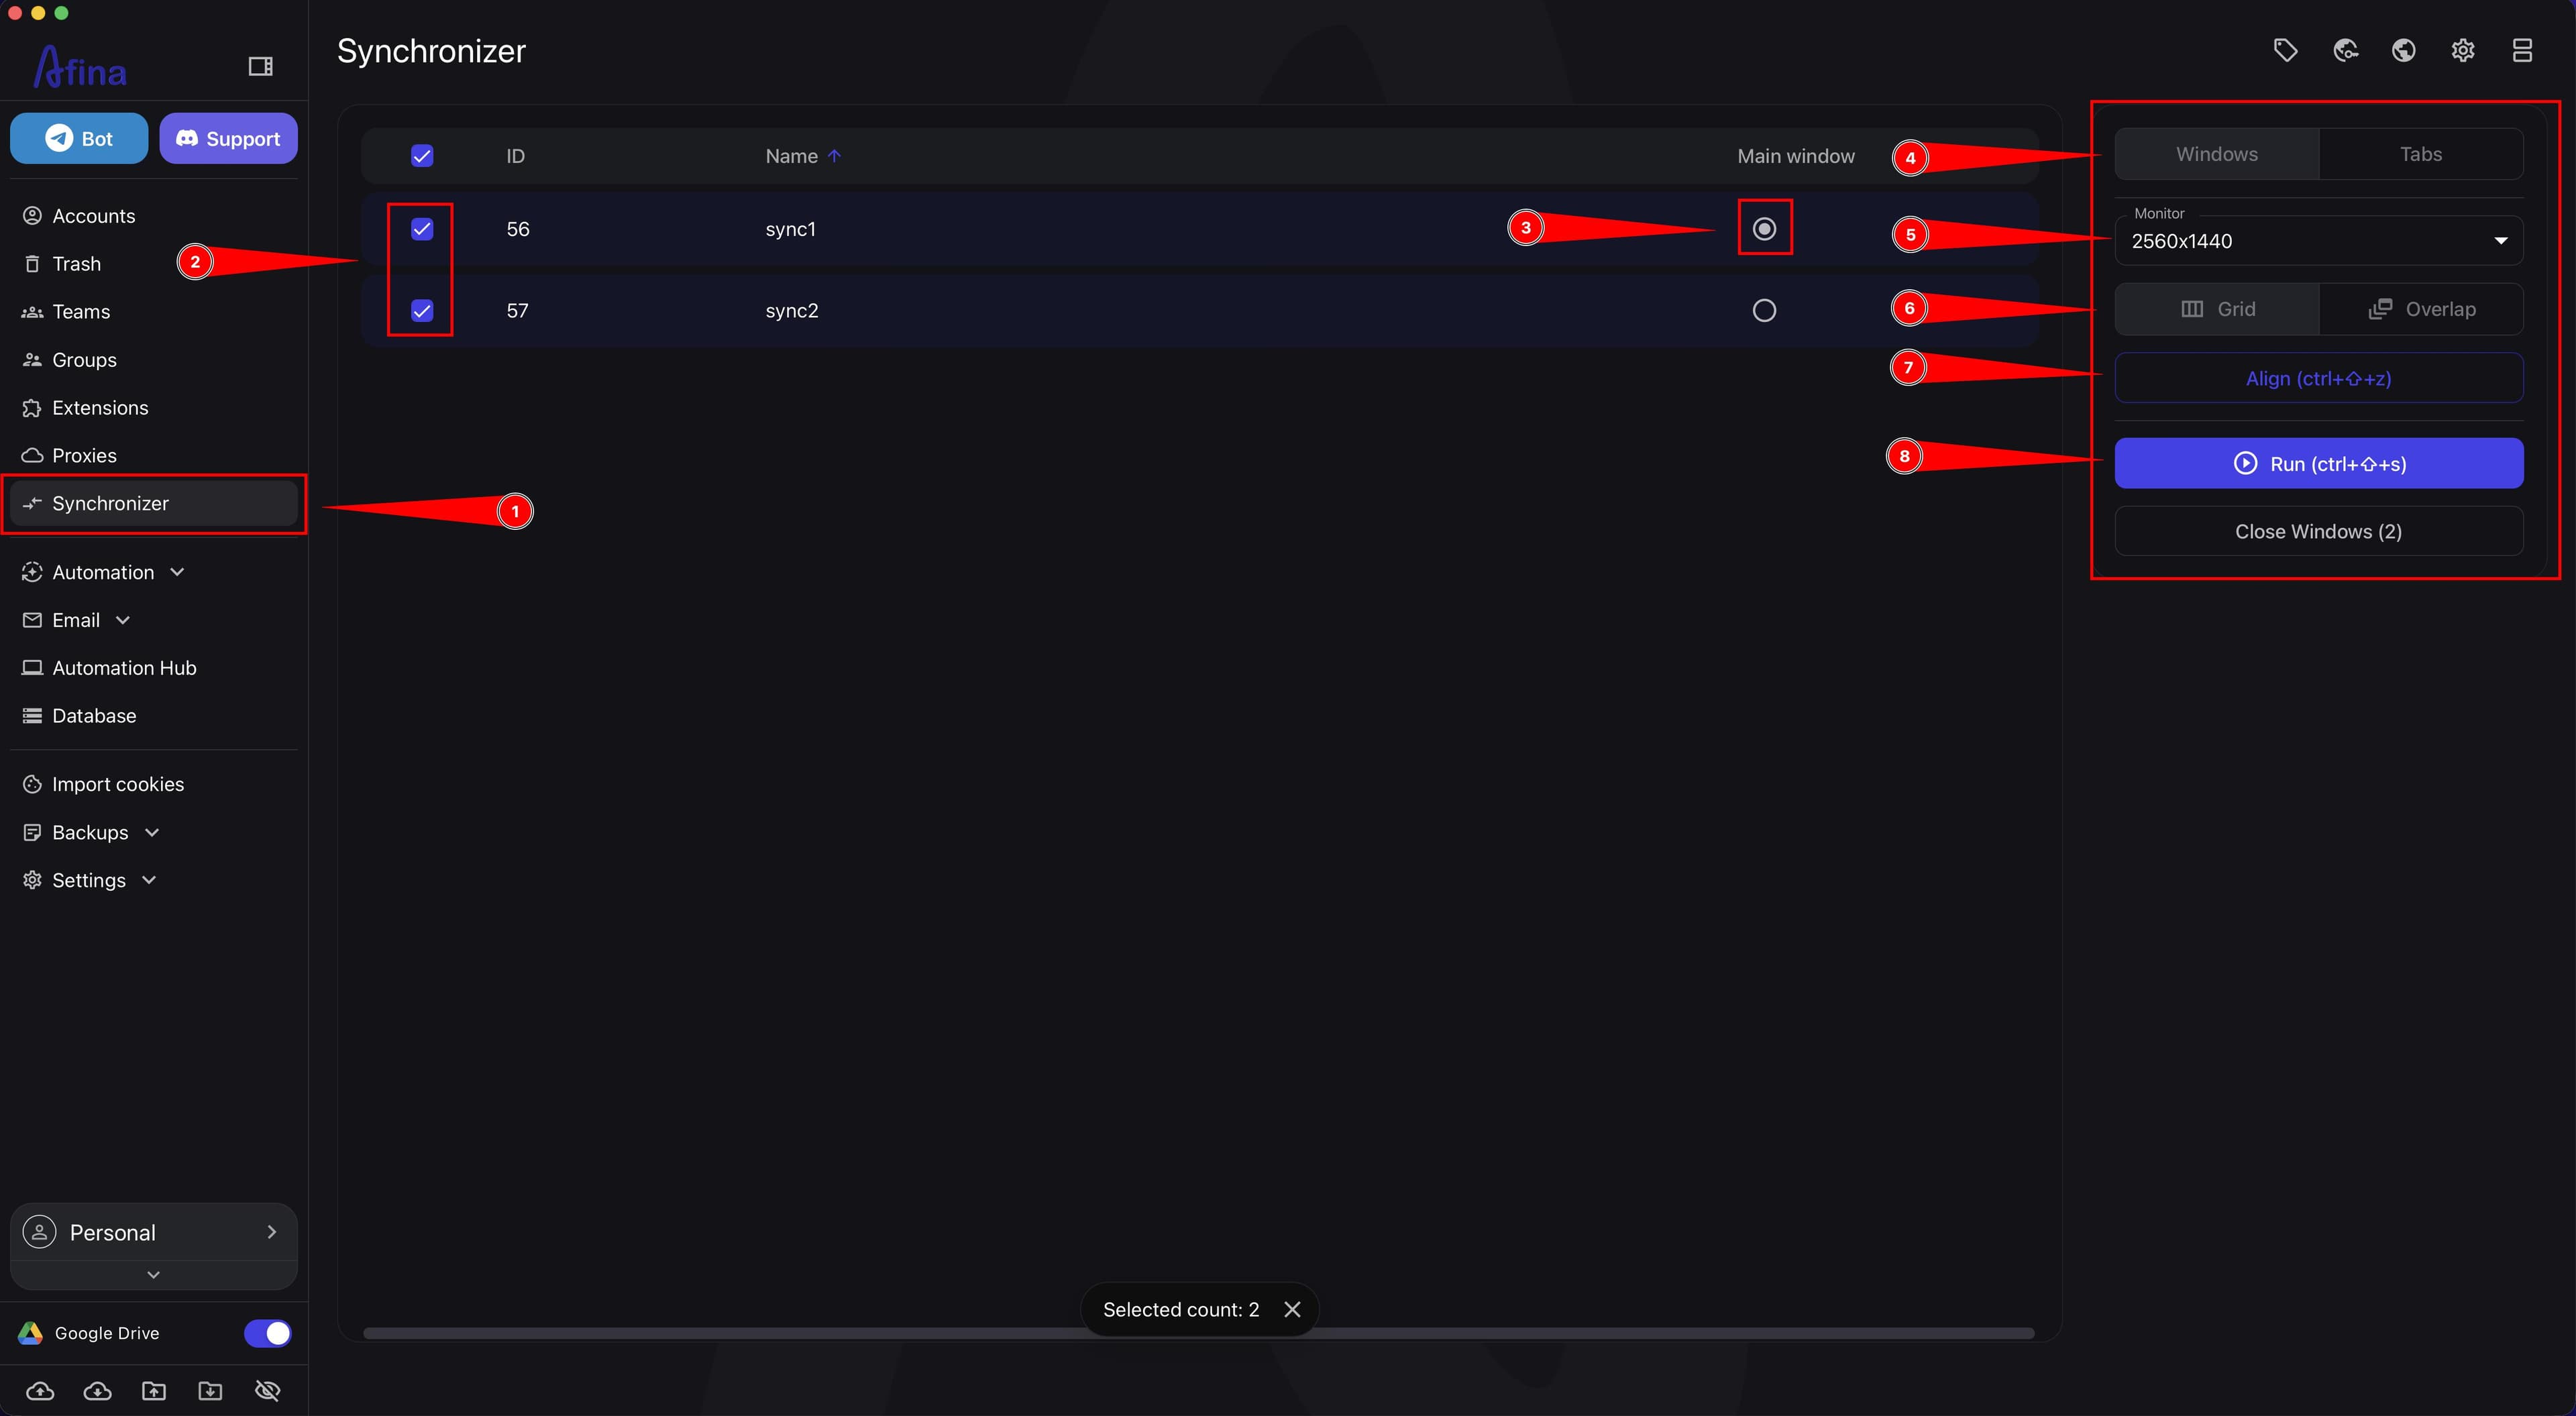
- Go to the Synchronizer section in the left navigation panel.
- Select the checkboxes in the rows of the accounts that should take part in the session.
- In the "Main window" column, select one profile from which clicks, text input, scrolling, and other actions will be copied.
- On the right panel, open the Windows tab.
- In the "Monitor" list, select the display where the profiles will be arranged.
- Enable "Grid" or "Overlap" mode, depending on the layout you need.
- Click Align to arrange the windows according to the selected mode.
- Click Start to initiate the action synchronization session.
- Perform the required actions in the Main window so they are automatically duplicated in all other selected windows.
- Click Stop when you need to end synchronization.
The screenshot below shows the "Synchronizer" window with selected accounts and the Windows tab before synchronization starts.
The next screenshot shows an active Synchronizer session after clicking Start.
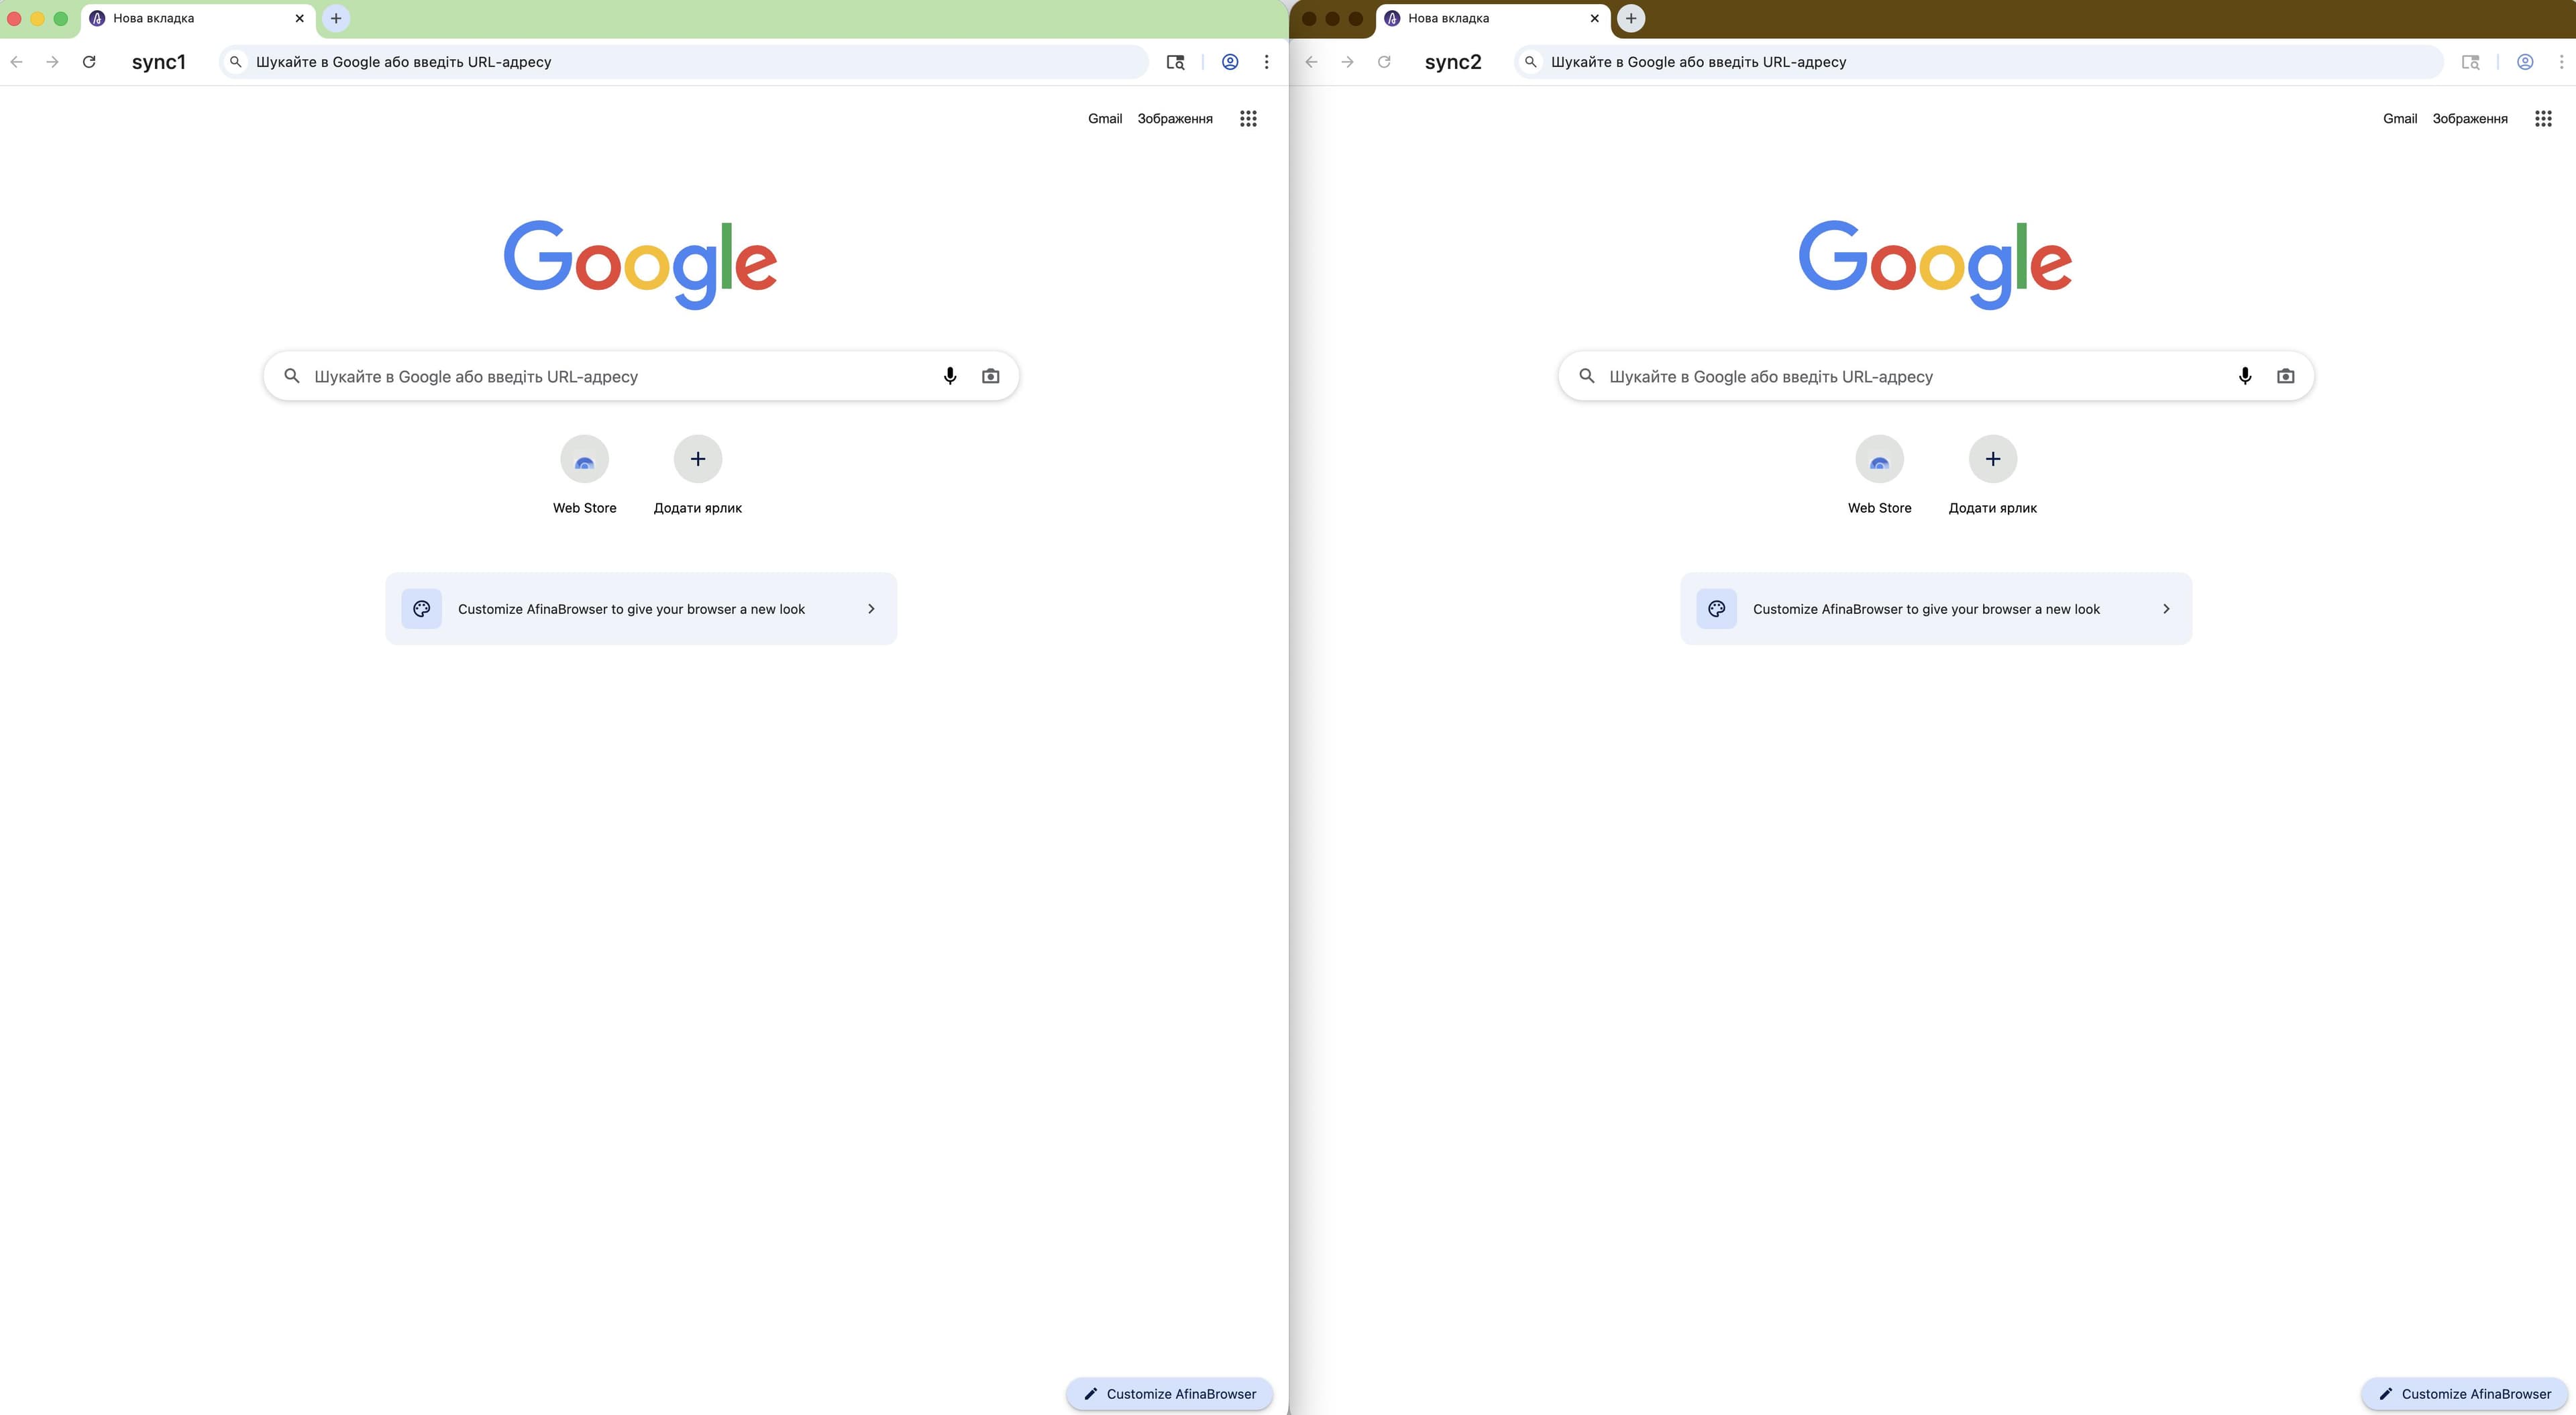
The Align button only arranges windows on the screen and does not start action synchronization itself.
Alignment and monitors#
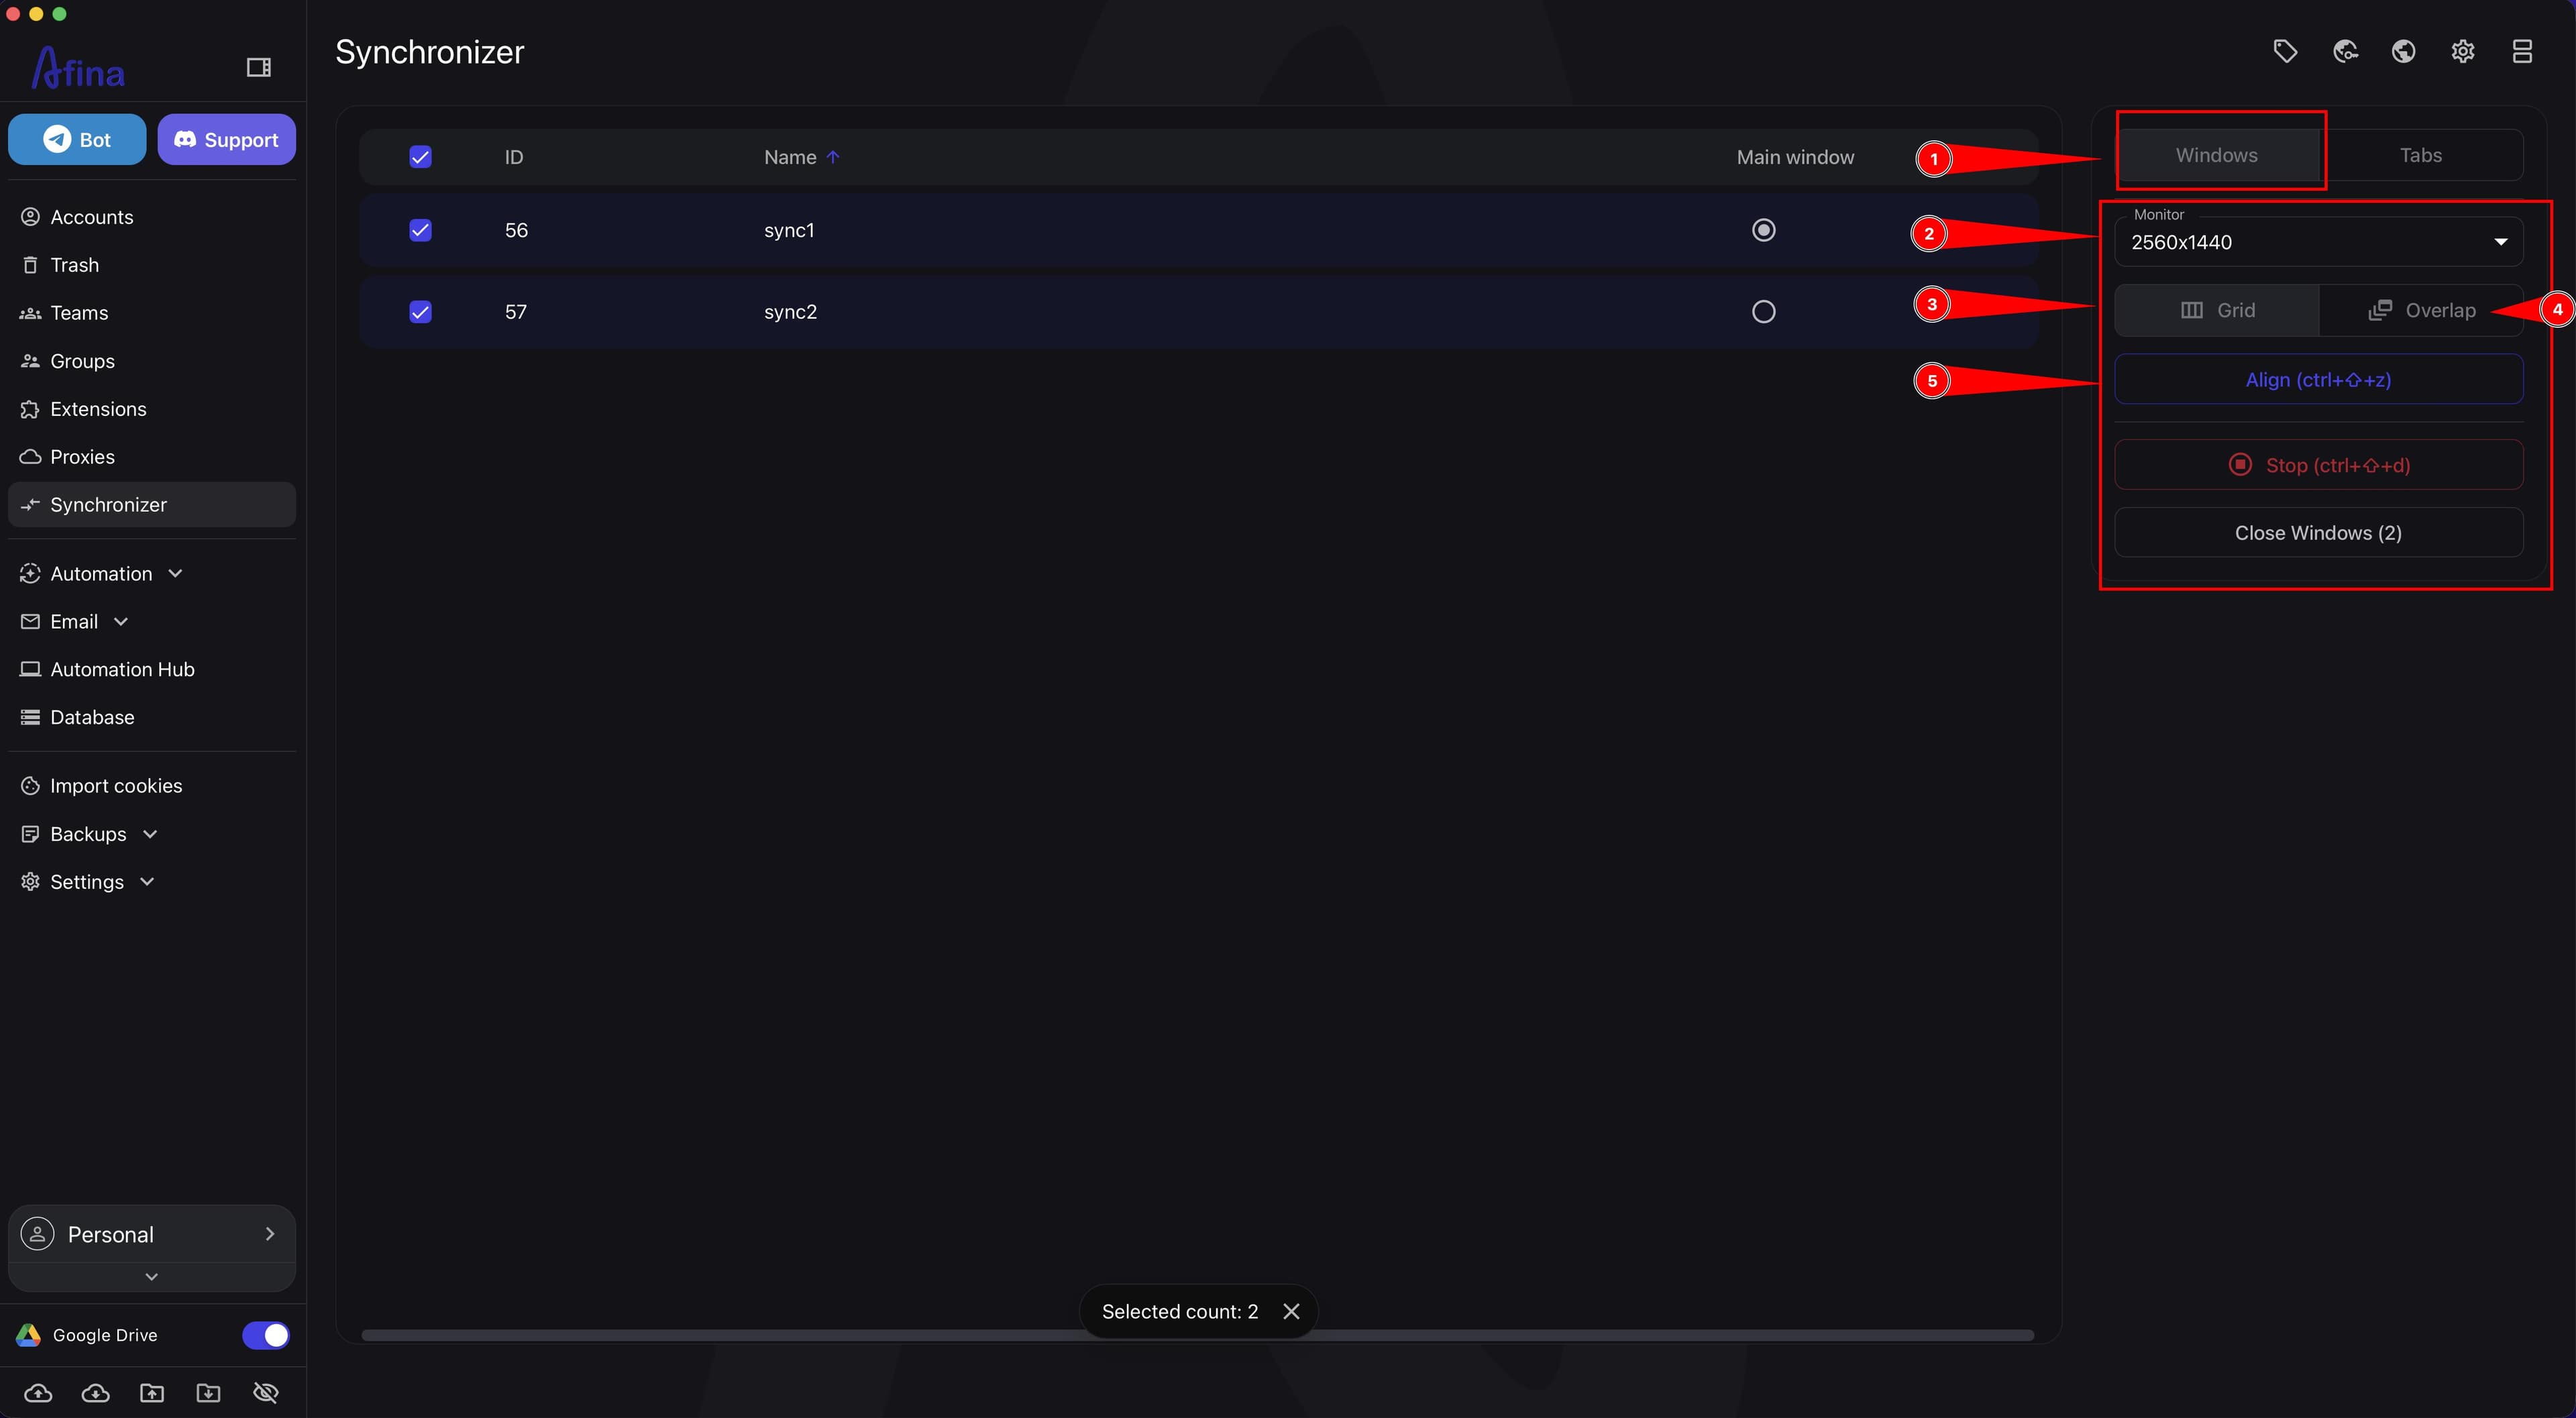
- Open the Windows tab if you need to change the layout of already running profiles.
- In the "Monitor" list, select another display if you want to move windows from one monitor to another.
- Enable "Grid" mode if you need to place windows without overlapping, each in a separate area.
- Enable "Overlap" mode if you need to allow windows to overlap each other.
- Click Align after changing the monitor or mode to apply the new settings.
- Repeat the selection in the "Monitor" list and click Align again if you need to quickly move the whole group of windows to another screen.
- Click Close Windows if you need to close all browsers involved in the current session in bulk.
The screenshot below shows the Windows tab with the "Monitor" list, "Grid" and "Overlap" modes, and the Align button.
Bulk tab management#
- Make sure the required accounts are selected with checkboxes in the main table.
- Open the Tabs tab on the right panel.
- Click Same Tabs to make the set of open pages in all windows the same as in the Main window.
- Click Close Empty Tabs if you need to remove pages where nothing has loaded.
- In the "URL(s)" field, paste one or more URLs if you need to open pages in bulk across all selected profiles.
- Click Open Tab to open the entered URLs in the selected windows at the same time.
- Click Same Tabs again if you need to align the set of pages again after manual changes in the windows.
The screenshot below shows Tabs with the Same Tabs and Close Empty Tabs buttons, the "URL(s)" field, and the Open Tab button.
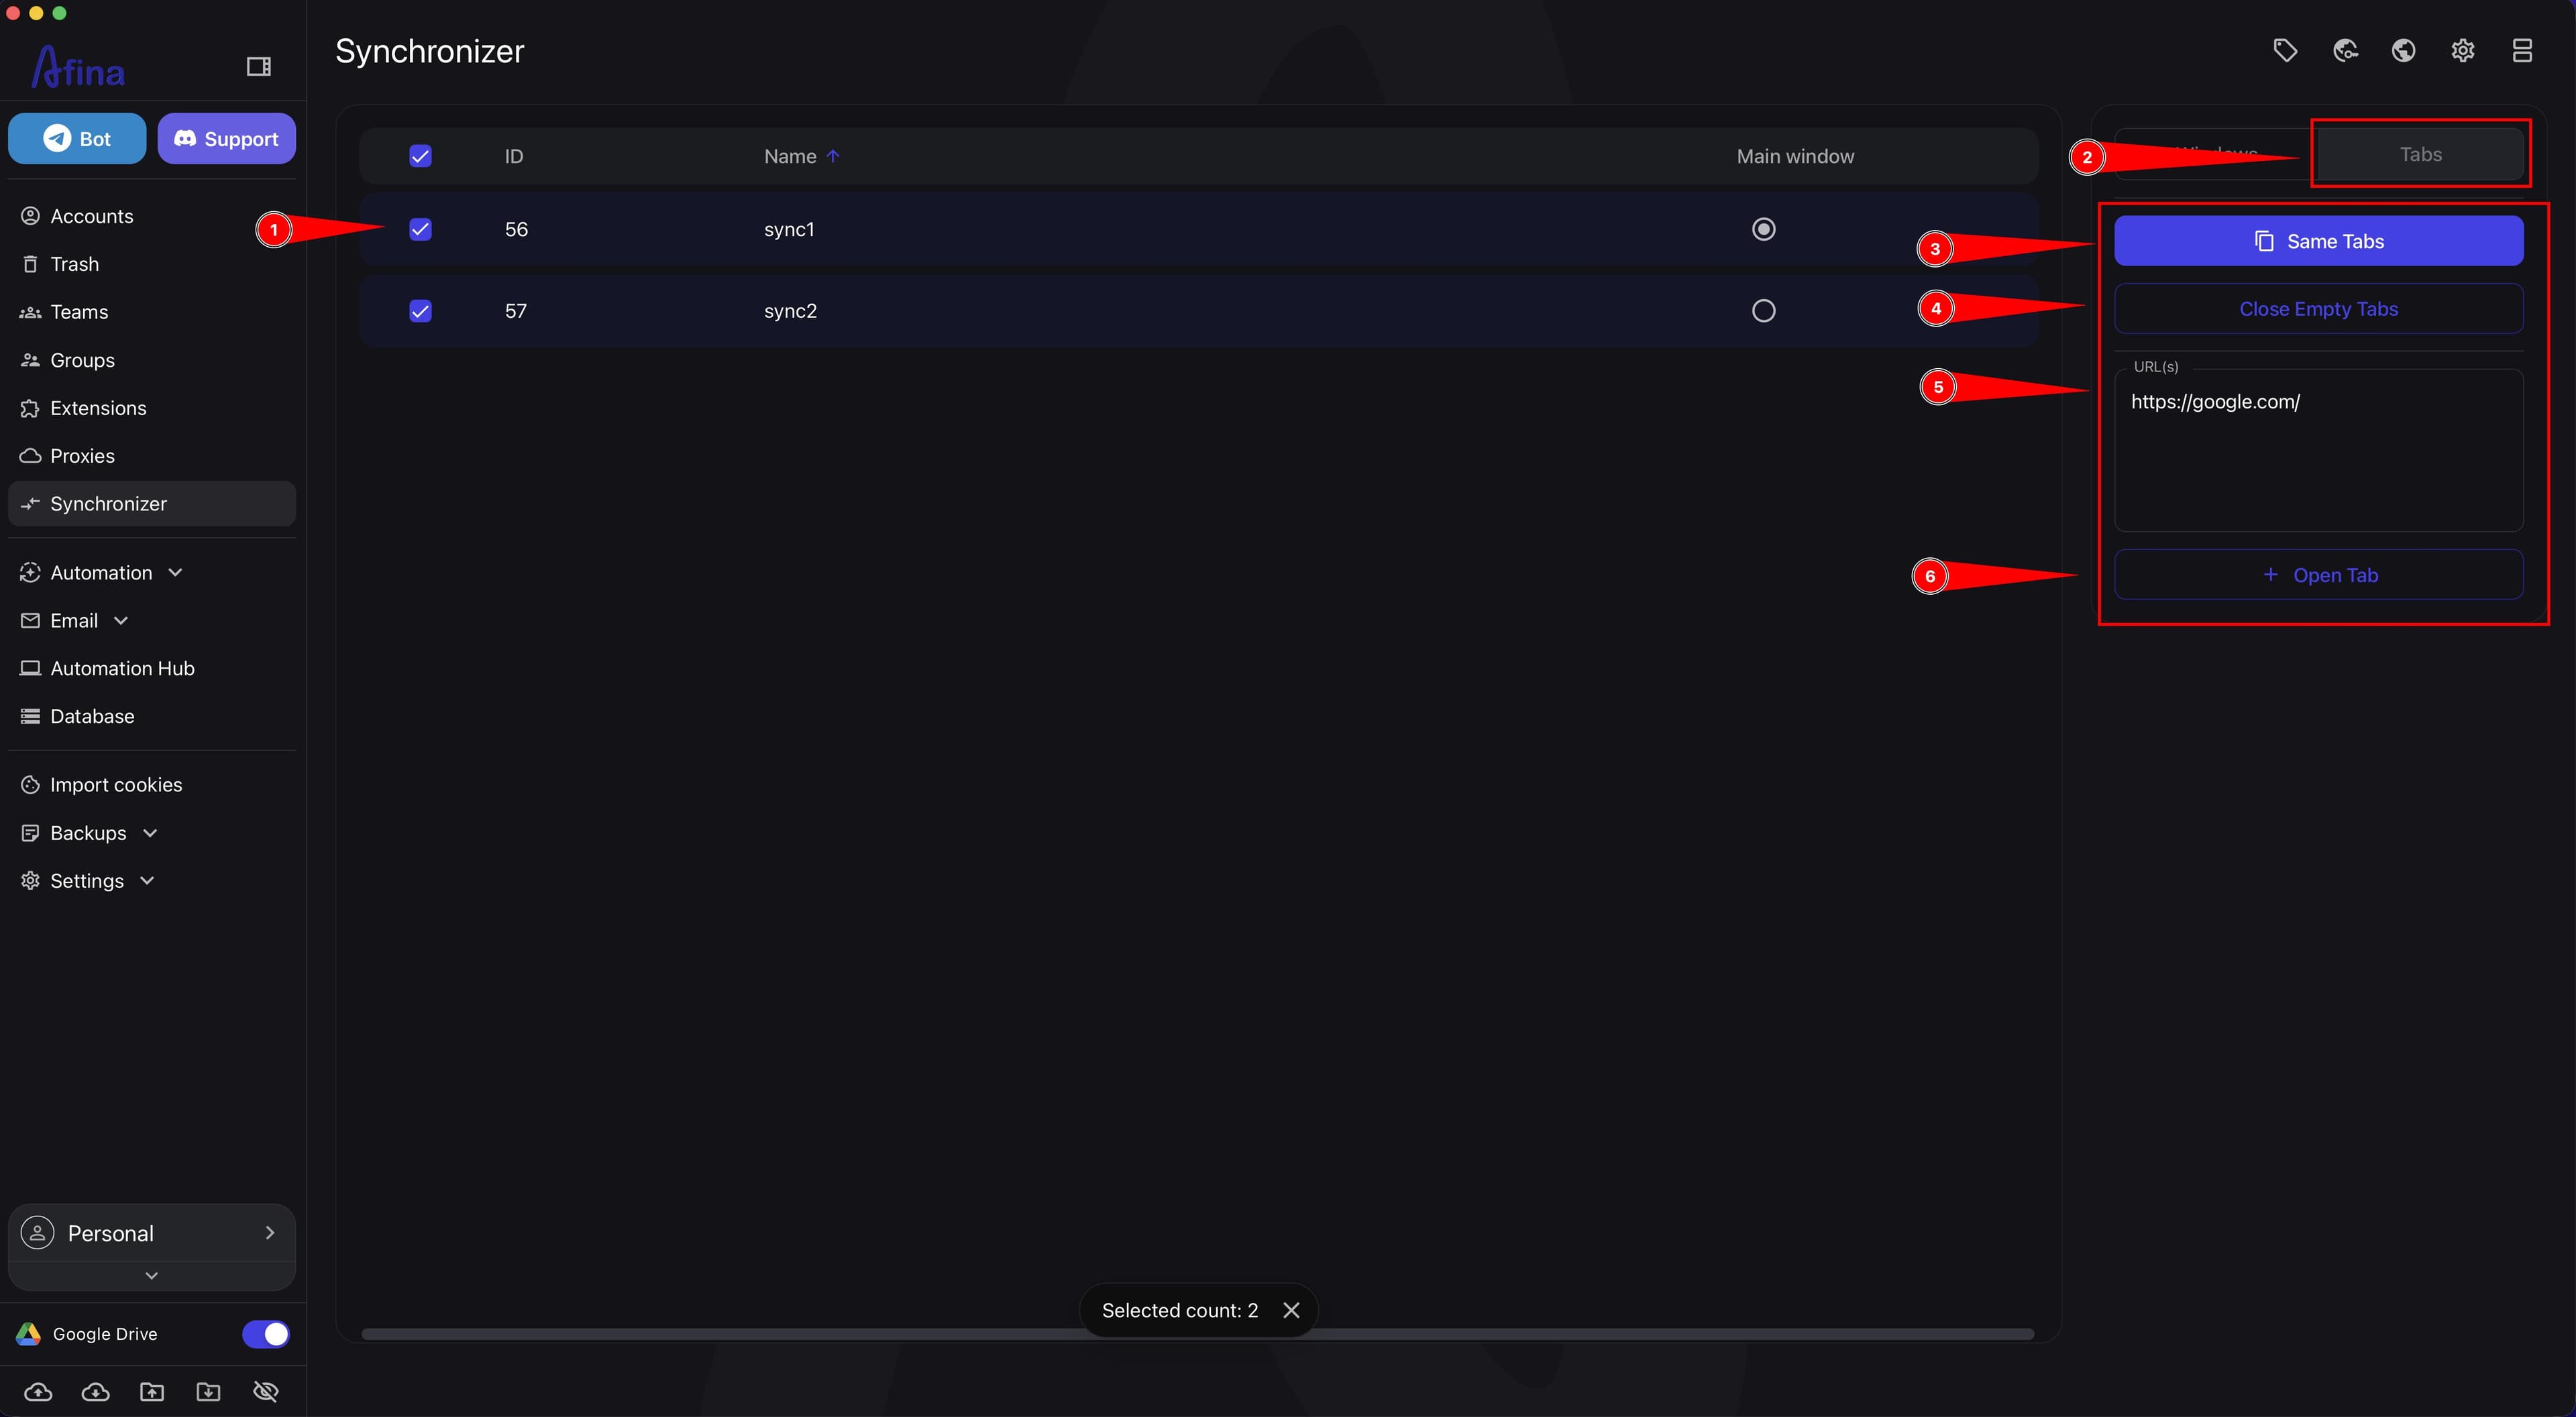
Before using actions in the "Tabs" tab, always check whether the required accounts are selected with checkboxes in the main Synchronizer table.
Hotkeys#
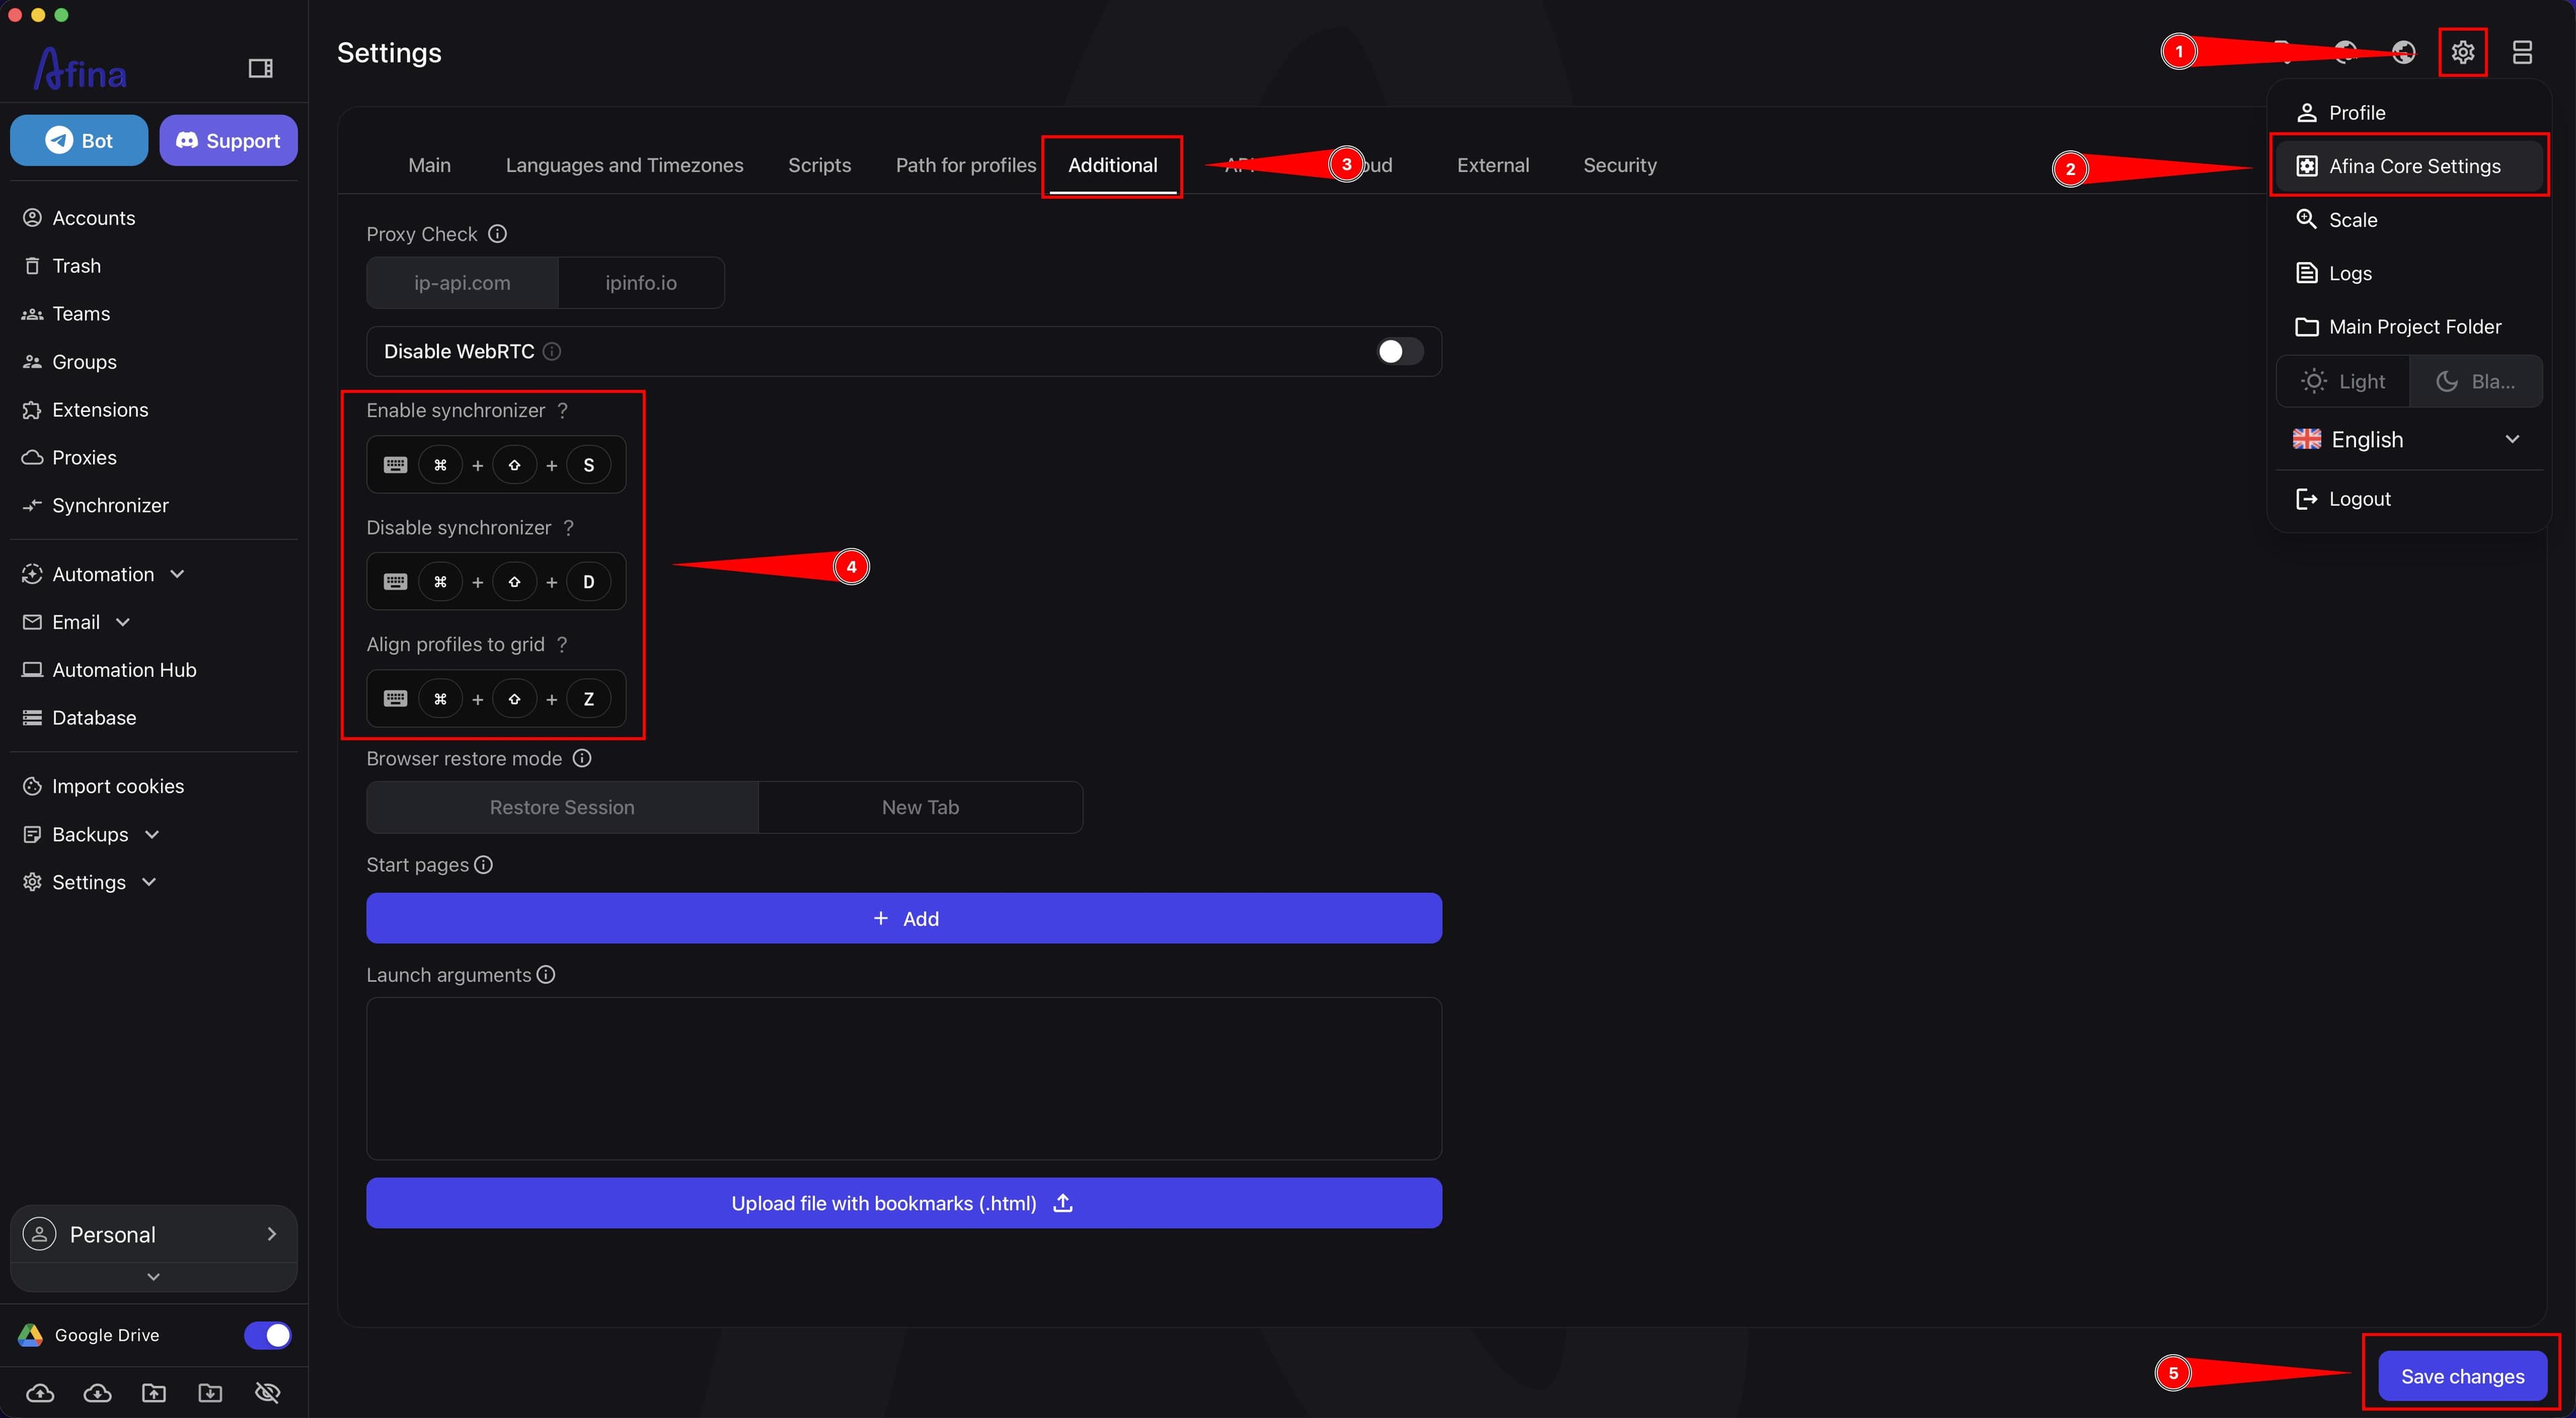
- Press Ctrl + Shift + S on Windows or Cmd + Shift + S on Mac to start synchronization.
- Press Ctrl + Shift + D on Windows or Cmd + Shift + D on Mac to stop synchronization.
- Press Ctrl + Shift + Z on Windows or Cmd + Shift + Z on Mac to align windows on the screen.
- Go to Afina Core Settings if you need to change the default combinations.
- Open the Additional tab.
- Change the hotkeys in the "Enable synchronizer", "Disable synchronizer", and "Align profiles to grid" fields if you want to set your own combinations.
- Click Save changes to apply the new hotkeys.
The screenshot below shows Afina Core Settings on the Additional tab, where you can change hotkeys for the Synchronizer.
Troubleshooting#
- Open macOS system settings if the Synchronizer does not work on Mac.
- Go to the "Privacy & Security" section.
- Open the "Accessibility" page.
- Add Afina to the list of apps that are allowed to control your computer, or enable the toggle next to Afina if the app is already in the list.
- Slightly move the problematic window manually with the mouse if windows do not align automatically or get stuck.
Result#
After completing these actions, you will be able to use the Synchronizer for everyday work with multiple profiles: select the Main window, start and stop synchronization, align windows, move them between monitors, and manage tabs in bulk across all selected accounts.