Proxies in Afina#
This guide helps you understand all aspects of working with proxies in Afina: from adding a single proxy to bulk import and export through files. You will learn which proxy types are supported, how to check whether they work, and how to use Excel for bulk updates.
Before you start#
- Prepare the proxy data you need to add manually or import.
- If you plan to import through Excel, make sure the file is saved in
.xlsxformat. - If you plan to add proxies in bulk as text, prepare the list so that each proxy starts on a new line.
Supported types#
Afina supports HTTP, HTTPS, and SOCKS5 connection types. The selected type determines how the network connection works in the profile.
- Use HTTP or HTTPS if you need a standard connection through TCP.
- Use SOCKS5 if you need UDP support.
- Use SOCKS5 if the proxy needs to support WebRTC.
WebRTC in Afina works automatically if a high-quality SOCKS5 proxy with real UDP support is set.
Not every proxy provider has real WebRTC or UDP support, even if it is stated in the service description. Residential SOCKS5 proxies with UDP can work unstably: leak DNS, fail to pass QUIC, fail TURN UDP, or show different IPs in HTTP and WebRTC. For stable WebRTC, it is better to use high-quality datacenter proxies with UDP and check them before work.
WebRTC can be fully disabled in the profile settings. This blocks RTCPeerConnection and helps reliably hide your real IP.
The IPv6 proxy format is not supported in Afina. Use proxies in IPv4 format.
Adding one proxy#
This method is suitable when you need to create one record manually and check it immediately before saving.
- Go to Proxies from the left panel.
- Click Add proxy on the action panel.
- Select the proxy type.
- In the "Host" field, enter the proxy address.
- In the "Port" field, enter the proxy port.
- In the "Login" field, enter the proxy login.
- In the "Password" field, enter the proxy password.
- In the "Change IP URL" field, enter the link for changing the IP if you have one.
- In the "Remark" field, enter an additional comment if needed.
- Click the check icon to check whether the proxy works.
- Click Save.
The screenshot below shows the form for adding one proxy with fields for type, address, port, login, password, Change IP URL, and Remark.
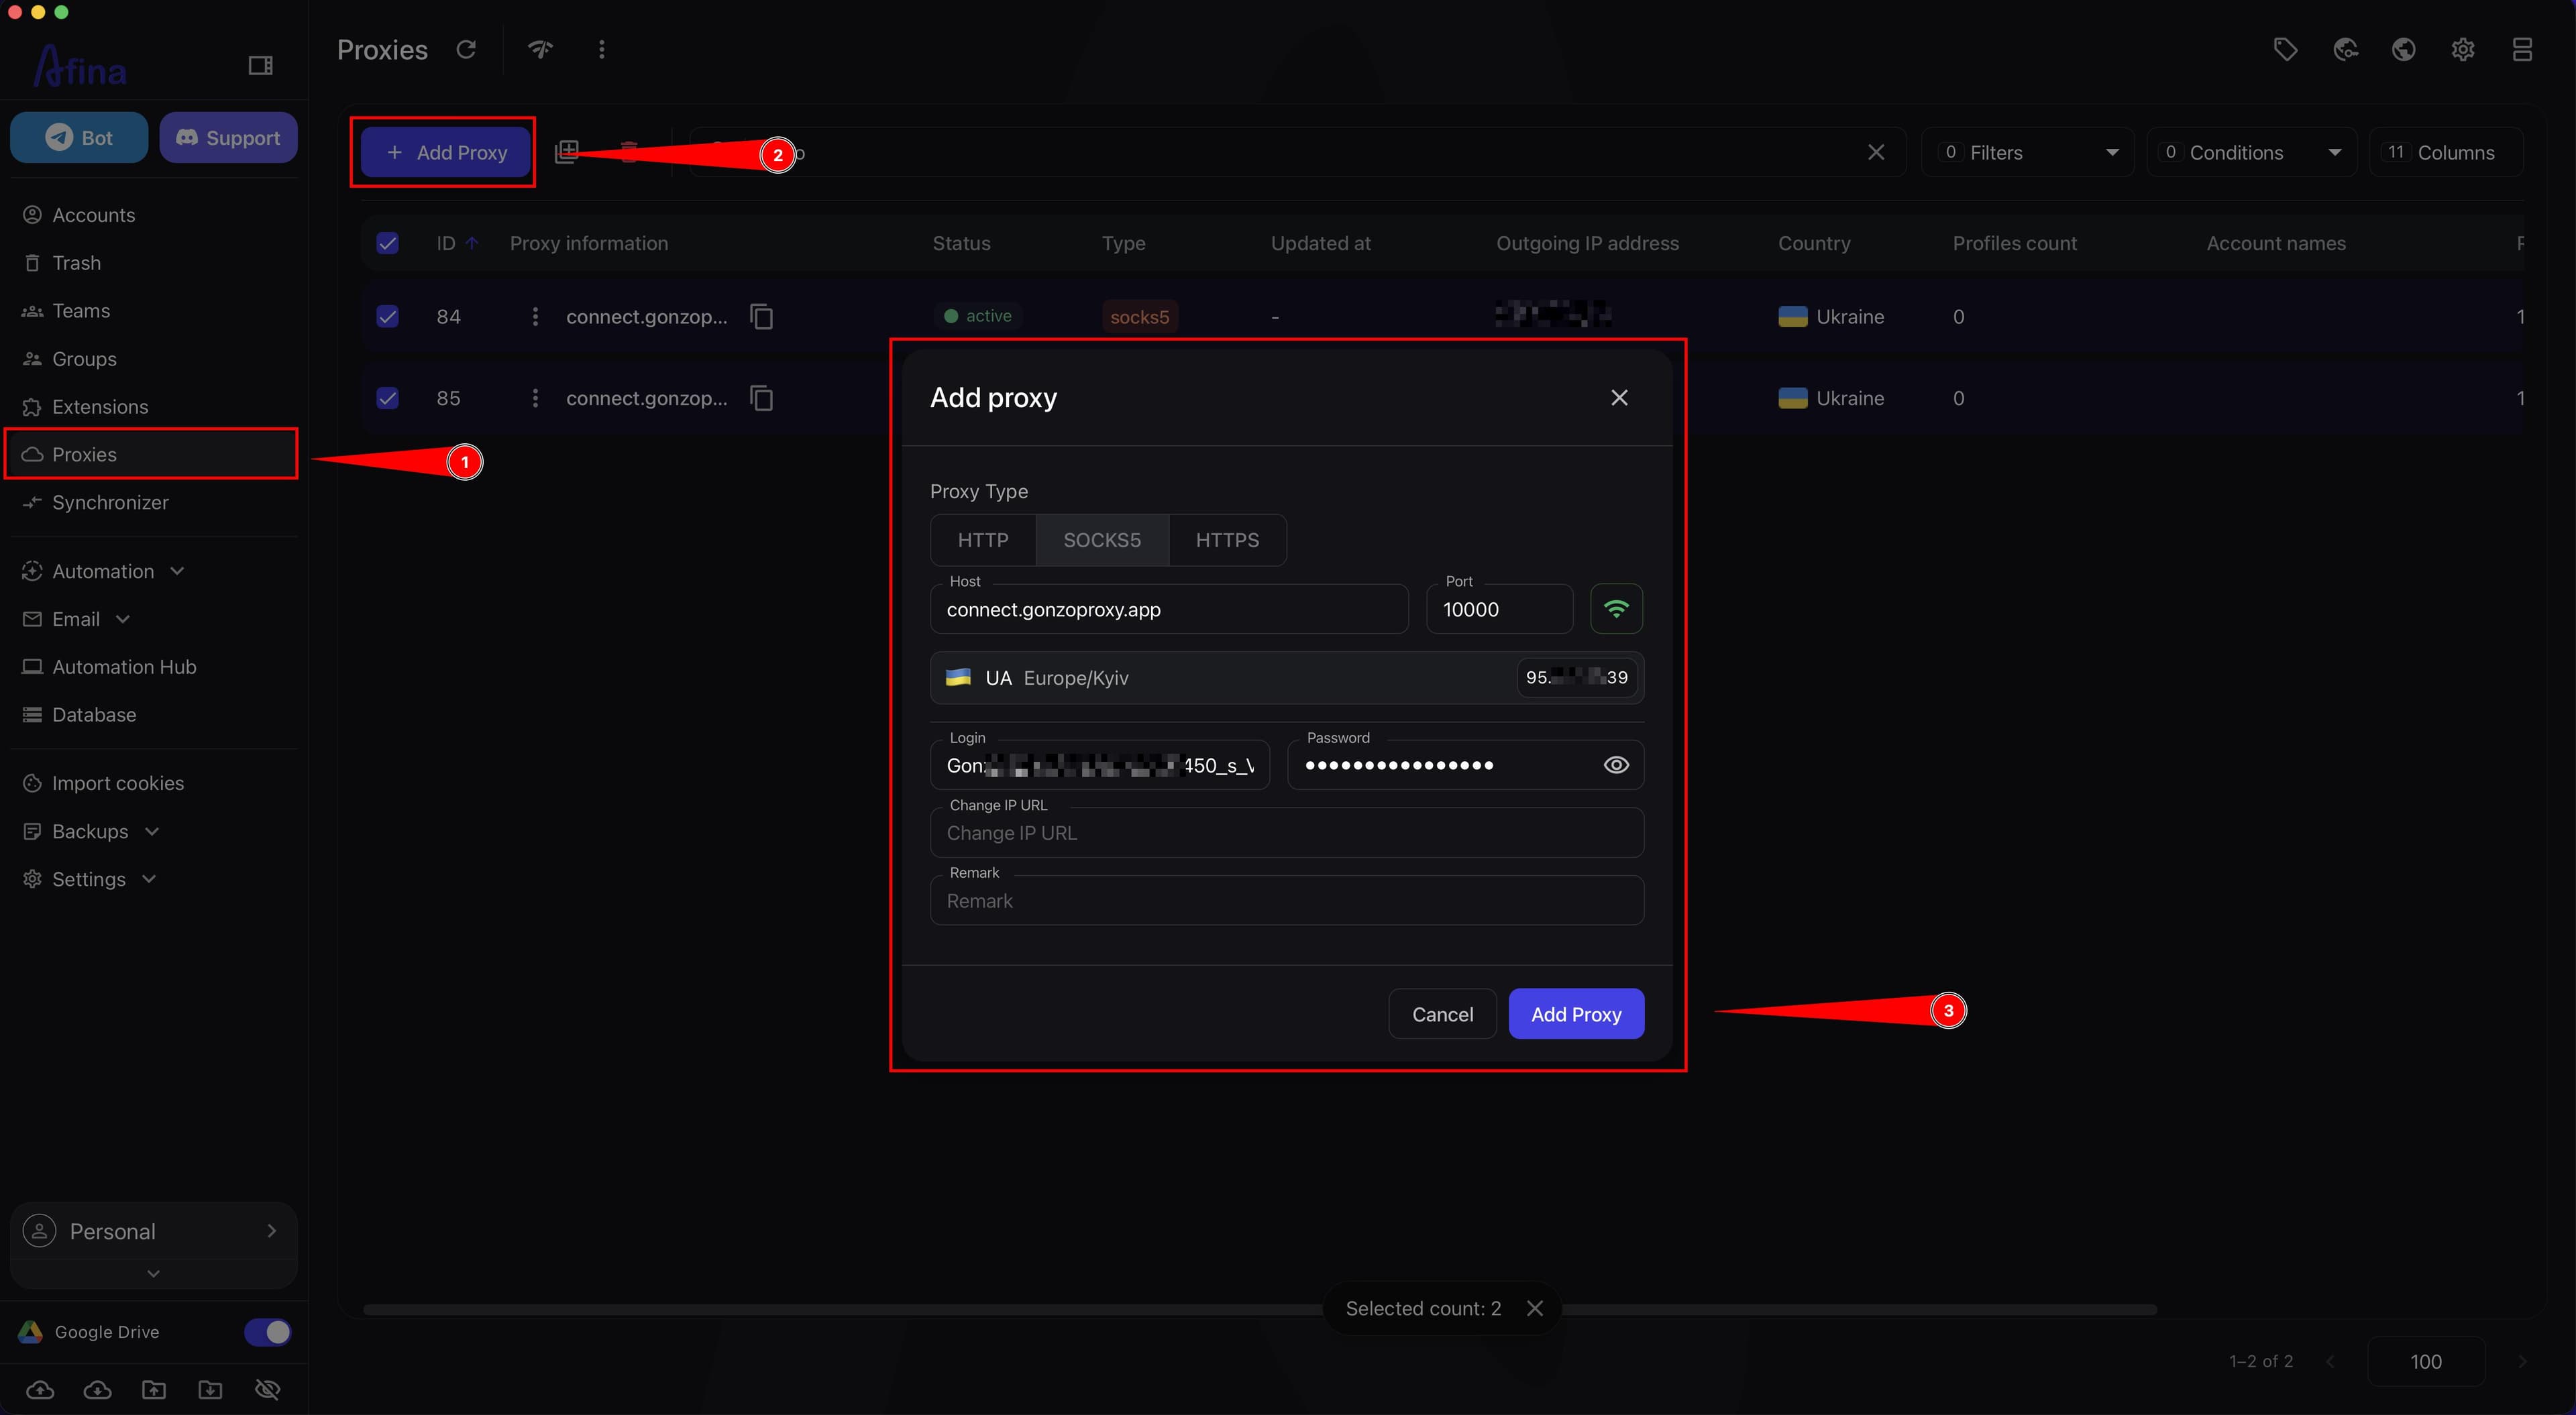
Change IP URL and Remark are optional fields.
Bulk adding as text#
This method is suitable when you have a list of proxies in text format and need to add it at once.
Afina does not set a limit on the number of proxies that can be added through bulk adding as text. Prepare the list so that each record starts on a new line.
- Go to Proxies.
- Click the ➕ icon.
- In the "Proxies" field, paste the list of proxies.
- Make sure each new proxy starts on a new line.
- Enter lines without a scheme in the format
192.168.0.1:8000:login:passwordif the proxy should be added as HTTP. - Enter lines in the format
socks5://192.168.0.1:8000:login:passwordif the proxy should be added as SOCKS5. - Add a remark at the end of the line in the format
{my_remark}if you need to save a comment for the proxy. - Add a change IP link at the end of the line in the format
[https://change-link.com]if you need to save the Change IP URL. - Use "Apply to all" if you need to quickly set the same type for the entire list.
- Click Add proxy.
The screenshot below shows the bulk adding window, where the list of proxies is pasted into the "Proxies" field one record per line.
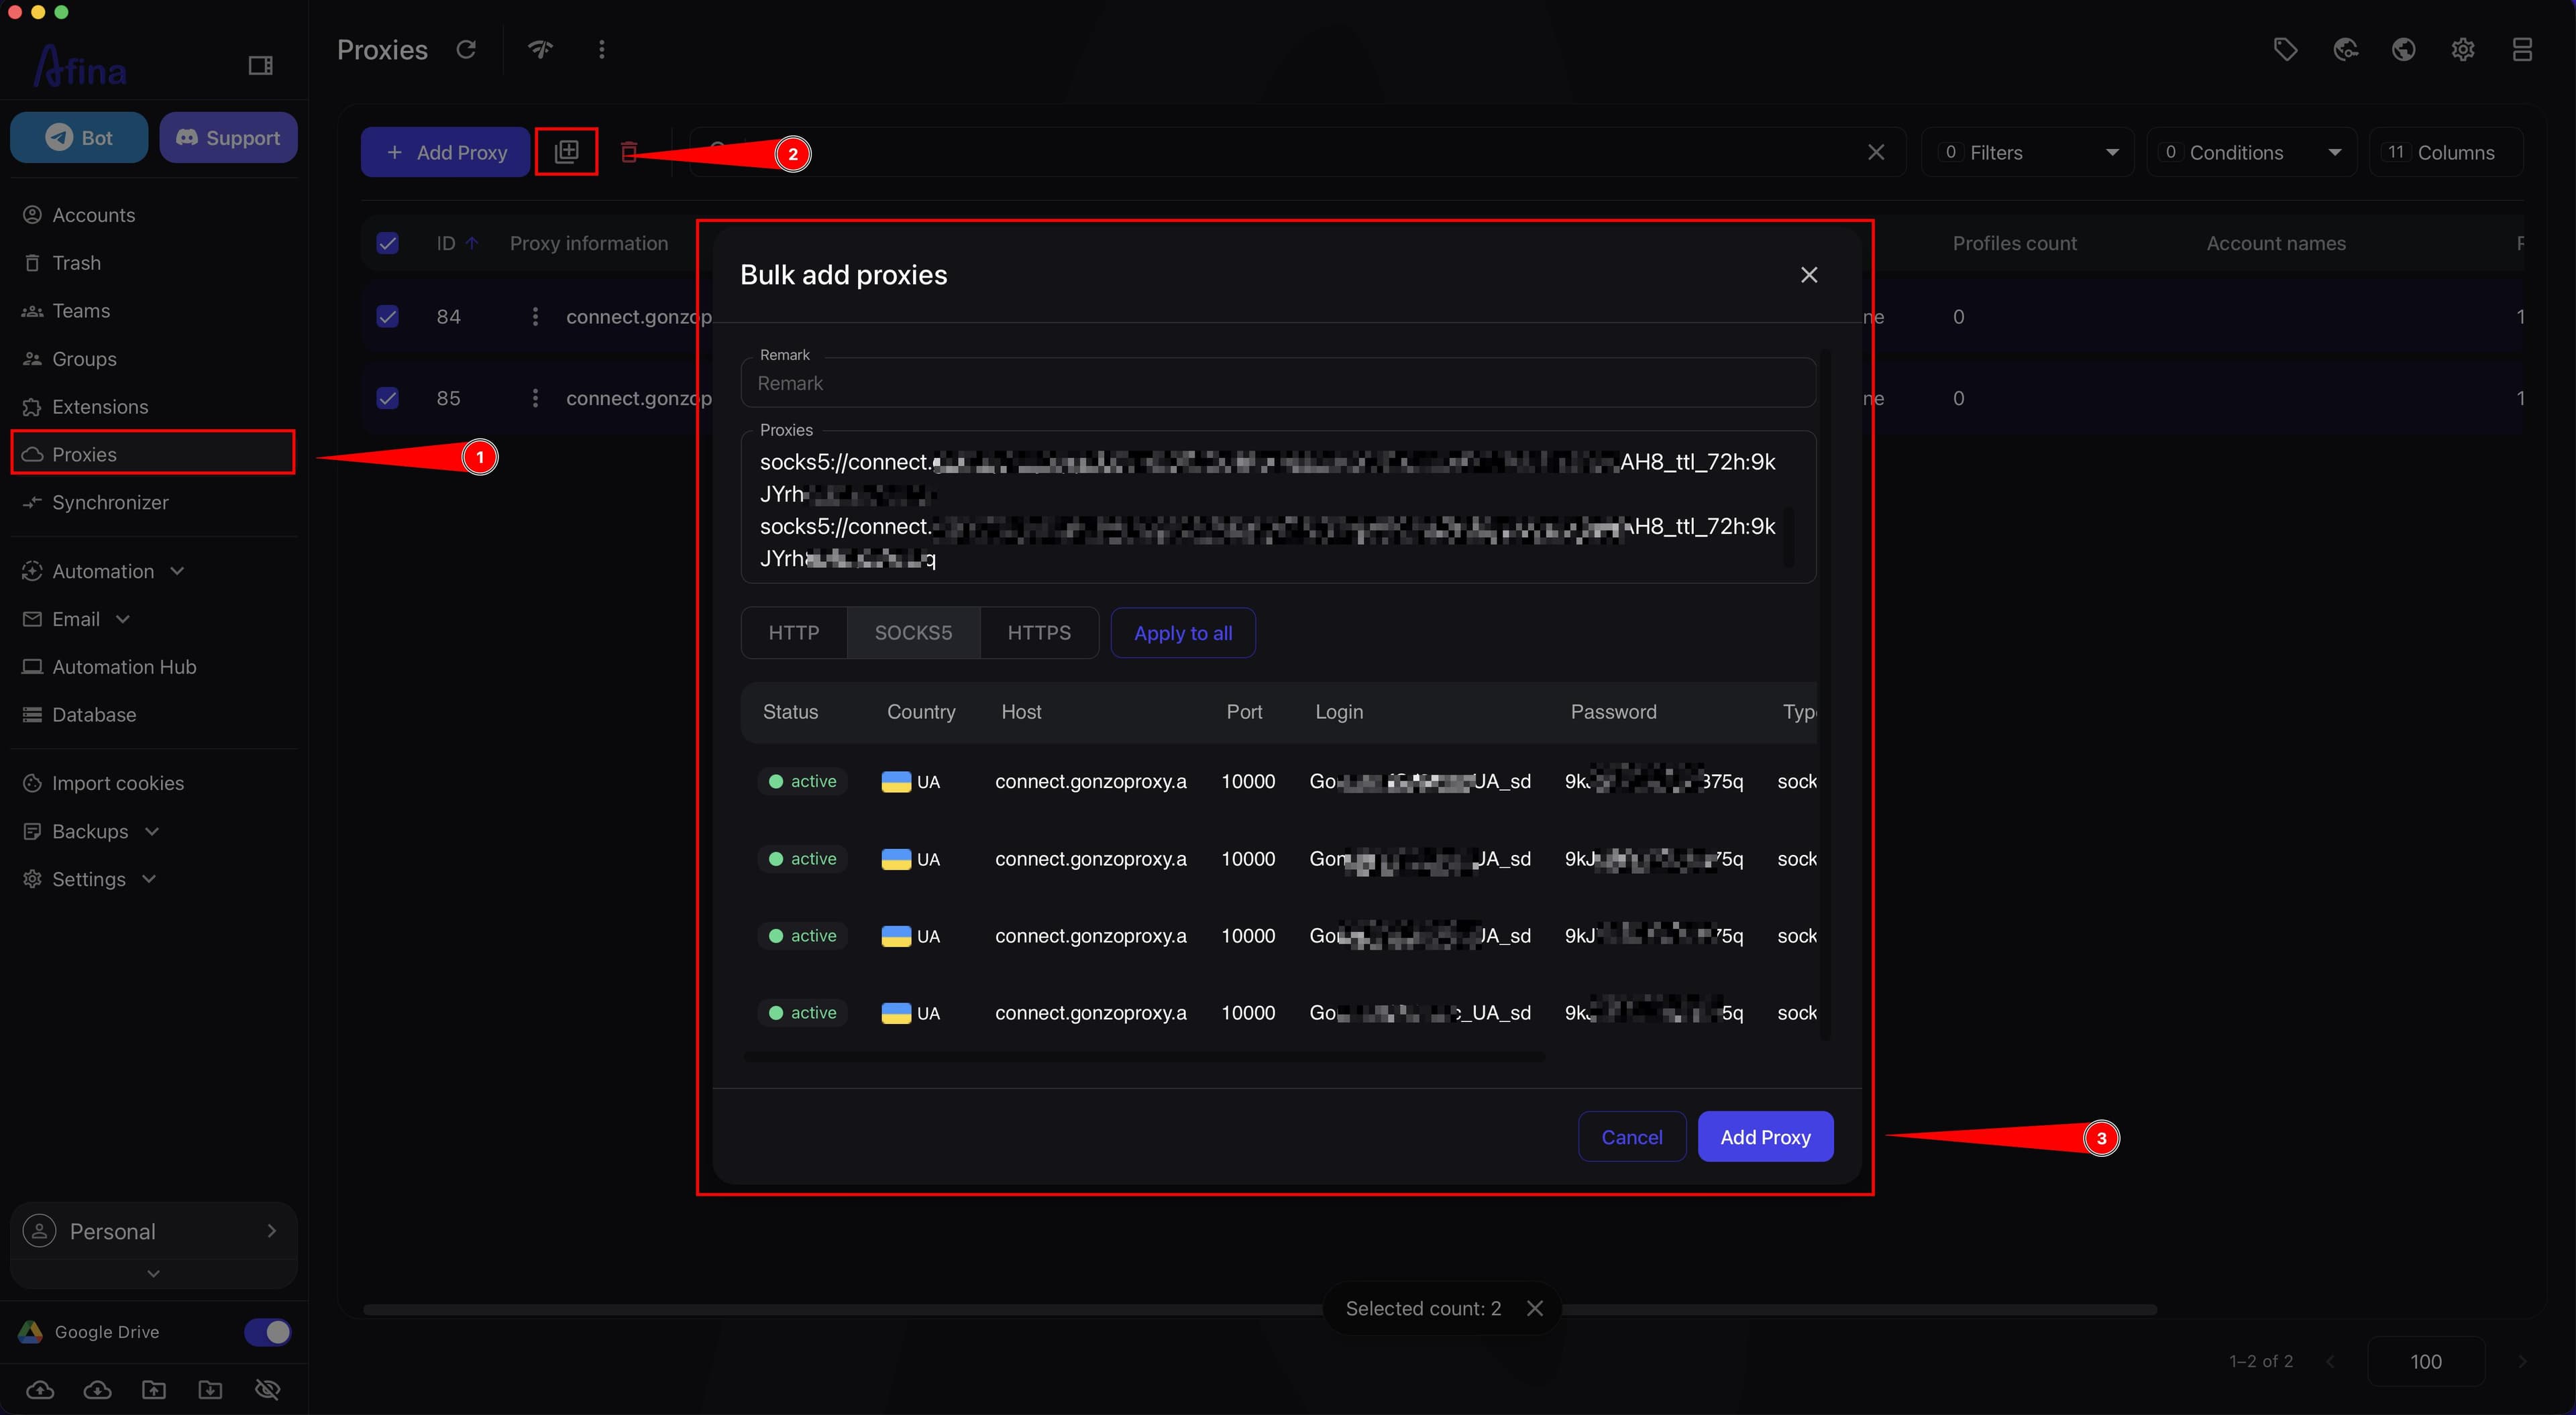
If you add proxies without specifying the type, Afina will automatically treat them as HTTP. For SOCKS5, always add the socks5:// prefix.
Some VPN extensions can block or change how proxies work inside the profile. If network issues appear after adding a proxy or the IP is displayed incorrectly, check whether a VPN extension is affecting the connection.
Importing proxies from Excel#
This method is convenient for bulk updating settings in existing accounts or for updating the proxy database.
- Go to Accounts or Proxies.
- Click the ⋮ icon.
- Select Import proxies from Excel.
- Select the prepared
.xlsxfile. - Click Open.
Through Accounts, Afina will match the data with profiles and update proxies in specific accounts. Through Proxies, Afina will update the proxy database with the current data from the table.
The best way to prepare a file for import is to export proxies to Excel first, then edit the resulting table.
Do not change the column structure if you use an exported file as a template. For import through "Accounts", the main matching columns are AccountName and AccountID.
For detailed instructions on importing through Excel, see the "Export and import proxies in Excel" guide.
Exporting proxies to Excel#
Export is needed for backup, data checks, or preparing a template for later import.
- Go to Accounts or Proxies.
- Select the required profiles or proxies with checkboxes in the table.
- Click the ⋮ icon.
- In Accounts, select Export proxies to Excel.
- In Proxies, select Export proxies to Excel.
- Select a folder on your PC.
- Click Save.
Through Accounts, the file will contain the account name, its ID, the proxy type, and the full connection string. Through Proxies, the file will contain the data from the proxy database itself.
For detailed instructions on exporting through Excel, see the "Export and import proxies in Excel" guide.
Checking and diagnostics#
With the checking tools, you can see whether a proxy works and quickly diagnose network issues.
- Go to Proxies to view record states in the table.
- Check whether the required records show the
ActiveorInactivestate. - Go to Accounts if you need to run a bulk check at the account level.
- Select the required accounts with checkboxes.
- Click the Check proxy icon on the top panel.
The screenshot below shows the proxies or accounts table, where you can check the Active and Inactive states and also start checking through the Check proxy icon.
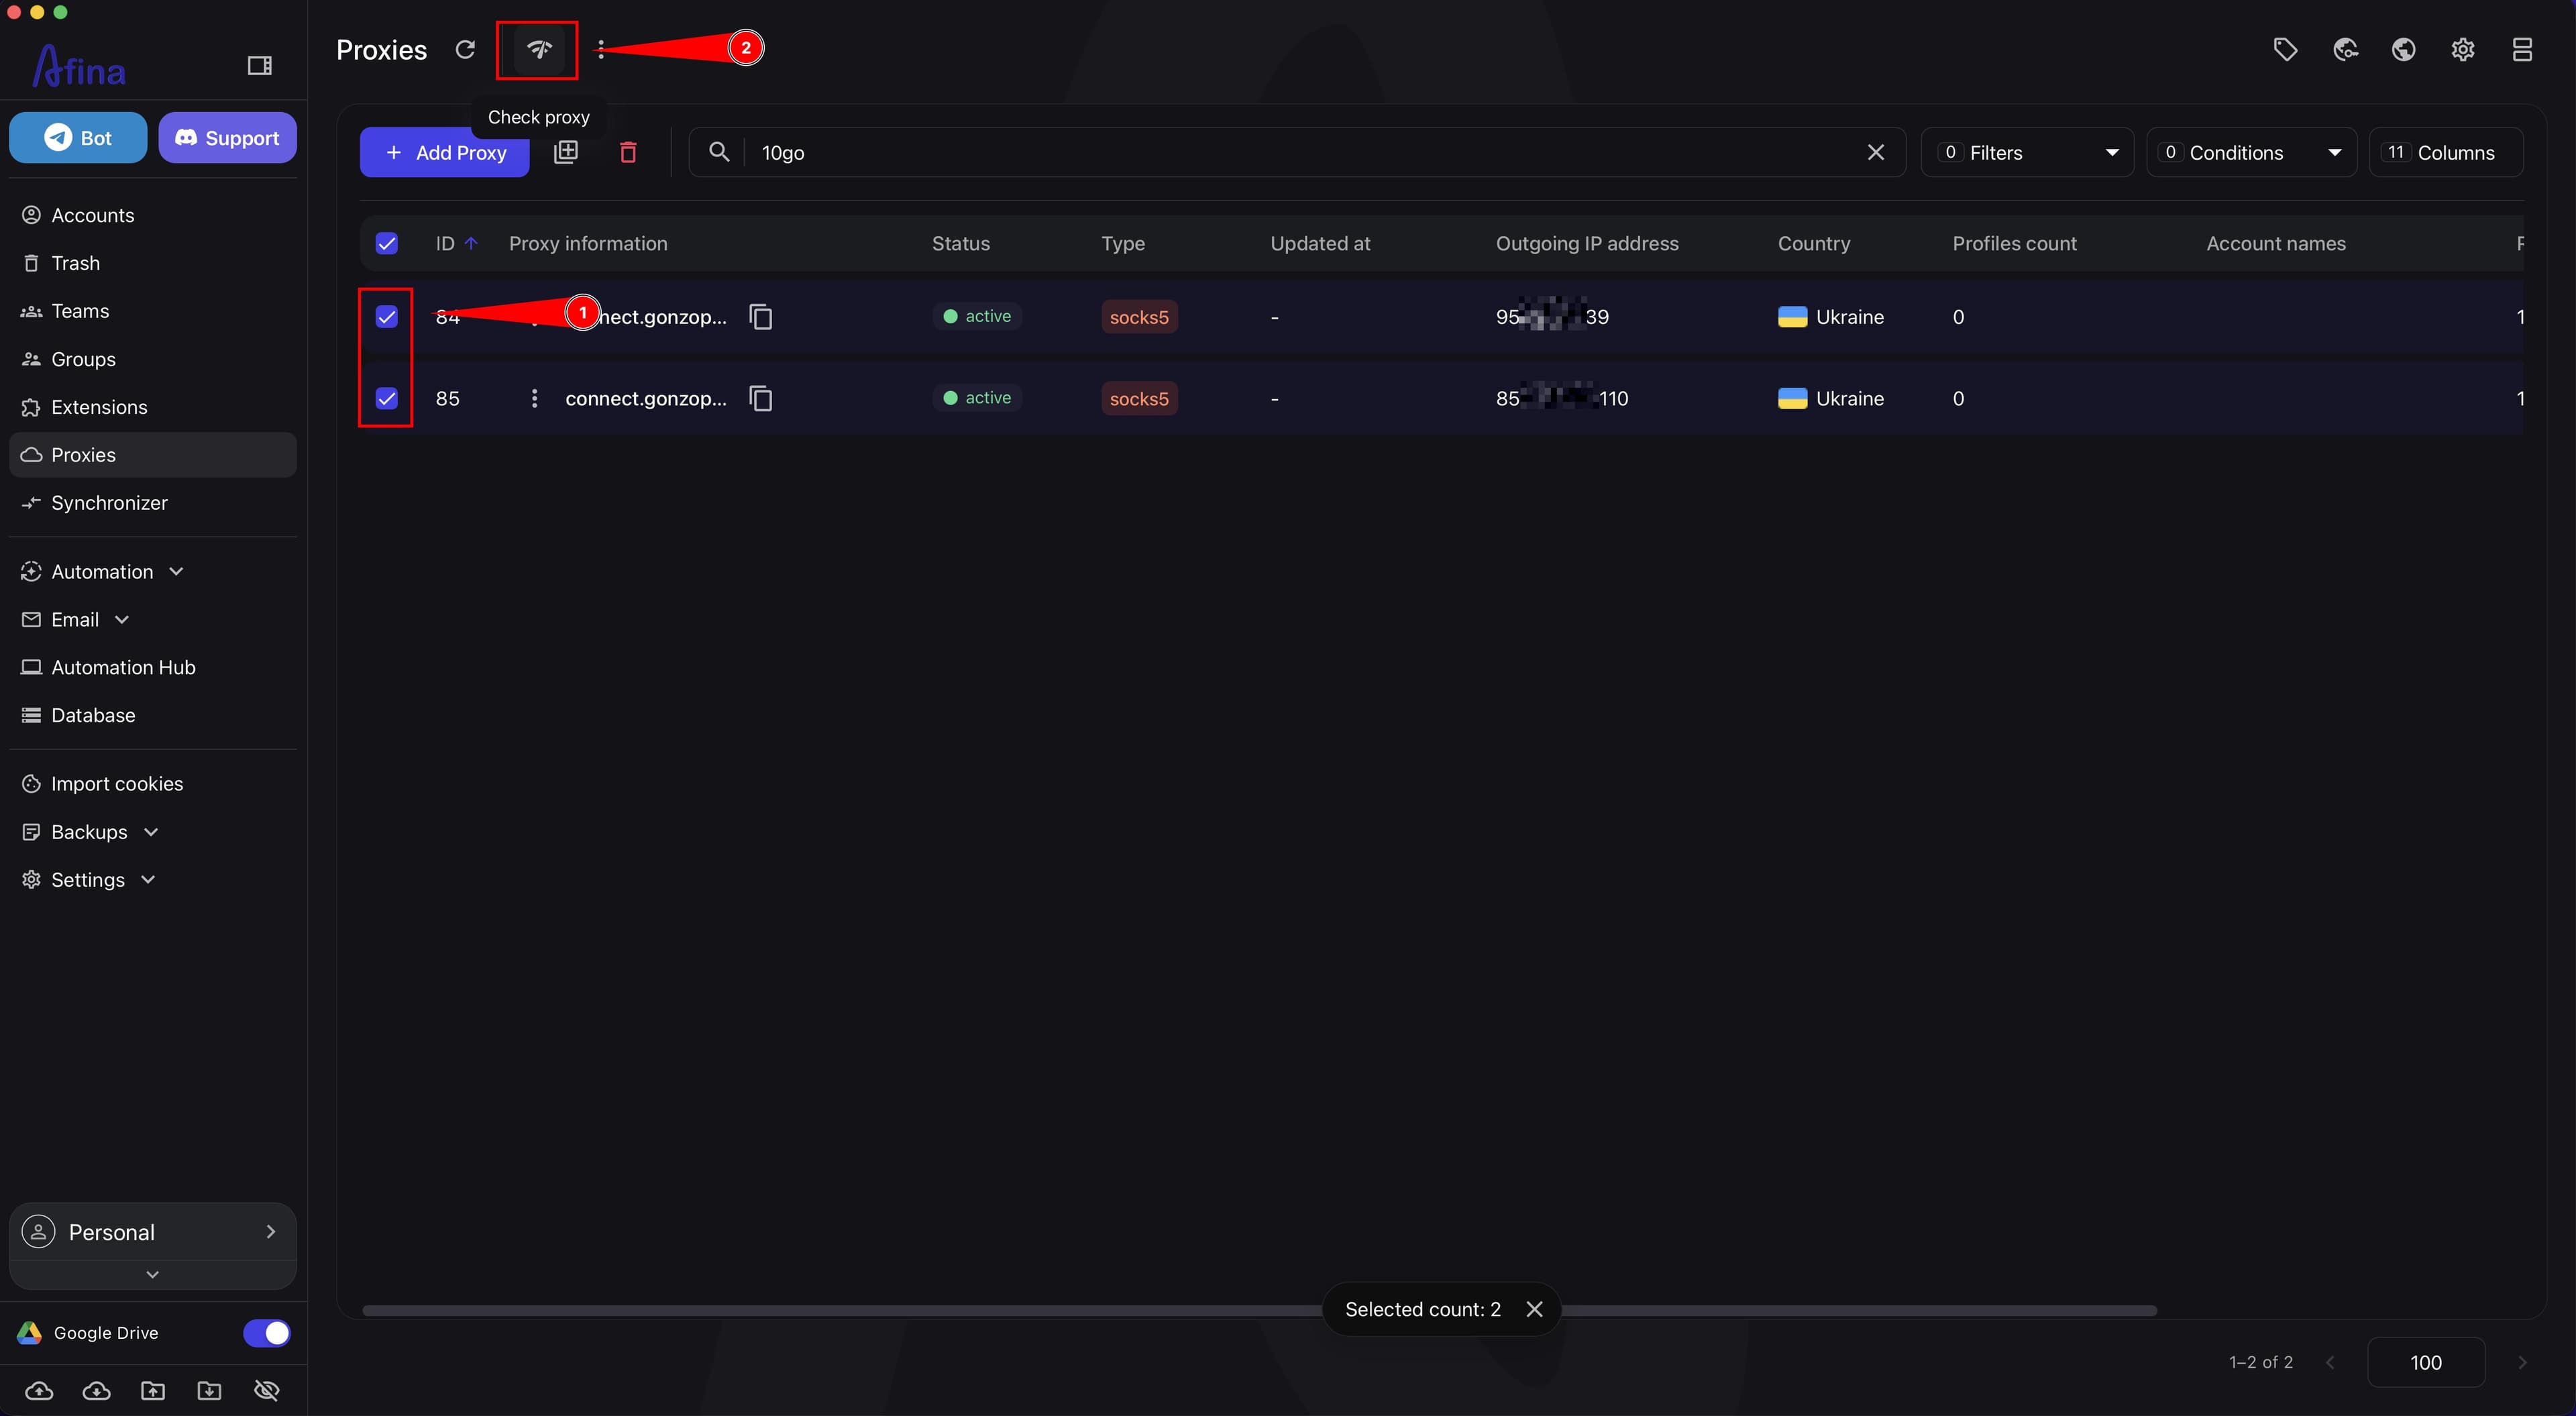
A proxy with the Inactive status needs to be checked again or its parameters need to be updated before use. If proxy checking is enabled in Afina settings, accounts with a non-working proxy will not start.
Deleting proxies#
Deleting a record from the Proxies table is irreversible. Before deleting, check whether this proxy is used in working accounts.
If you delete a proxy that is still used in working accounts, you will not be able to restore this record from the Proxies table. Before deleting it, make sure it is no longer needed.
Result#
After completing these steps, you will be able to add proxies one by one, import them in bulk as text, use Excel for import and export, check Active and Inactive states, delete unnecessary records, and diagnose network issues in Afina.